I created this project just for fun and to say Happy Halloween.
This was fun to create and I adore this skull, it is one of my favourite moulds.
Lots of dry brushing to bring depth to my design.
Red flowers which I coloured with Distress Inks. These flowers are from Tim Holtz Idea-ology line.
My substrate is a Tim Holtz Etcetera Tag.
Thanks so much for stopping by. Happy Halloween.
Tracy
xxx
Tuesday, 30 October 2018
Monday, 29 October 2018
Do Small Things with Great Love
Welcome, today I am showcasing my Blossomed Dreams Stamp Set #123 from AALLandCreate. All the new products are available from our stockists which you can find listed HERE.
I began by creating a background with Distress Oxides Worn Lipstick and Hickory Smoke. I applied the inks one by one to my non-stick craft sheet and then spritzed the ink with water and mopped up the beads of ink with my card. I repeated this process until I was happy with the coverage of ink.
I then did a monoprint using Autour de Mwa's Lotza Dotz Stencil #39, applying Hickory Smoke Distress Oxide Ink to my stencil, spritzing with water and then placing the stencil, ink side down and dabbing the back of the stencil with a piece of kitchen towel. Remove the stencil and then dry the ink with a Heat Tool. I added dimension to each of my flowers by adding a second flower head to the first stamping. I then painted each flower head with Worn Lipstick Distress Oxide Ink.
I then incorporated one of Tim Holtz metal embellishments and added black twine for added texture and I also included my sentiment from the same stamp set.
A few delicate splatters of black paint add a further layer of interest to my design.
Thanks so much for stopping by. Tracy x x
These are the products I incorporated in my card today and are now available from our stockists.
AALLandCreate Web Page
AALLandCreate Facebook Page
AALLandCreate Fanatics Facebook Page
AALLandCreate Boutique.
Friday, 26 October 2018
Numbered Botanical
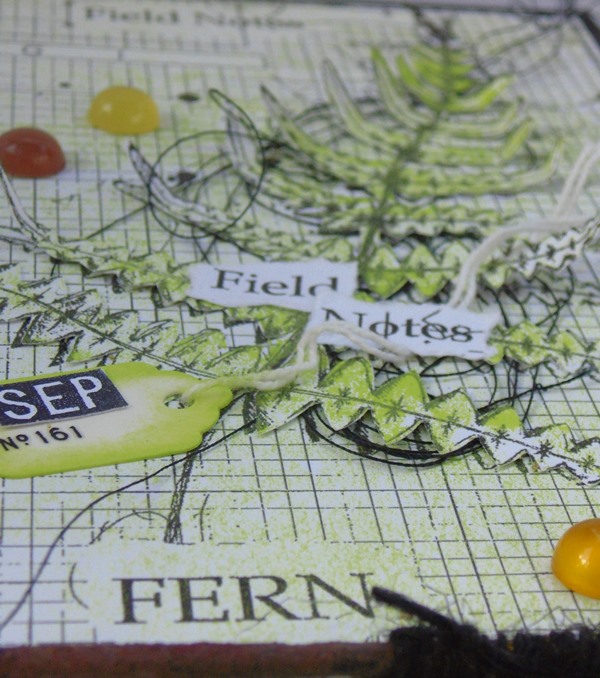
I love using the colour green in my artwork and of course the Fern seemed the perfect partner with my colour palette this time around.
I love the fern from my A4 Numbered Botanical Stamp #110 from AALLandCreate. All the new products are available from our stockists listed HERE.
I stamped my fern onto white card and then stamped it a second time and cut out the image and added to the top of the first image for extra dimension. I added Field Notes to the centre of my focal image. I also included a small tag with a month added from my Date It stamp set.
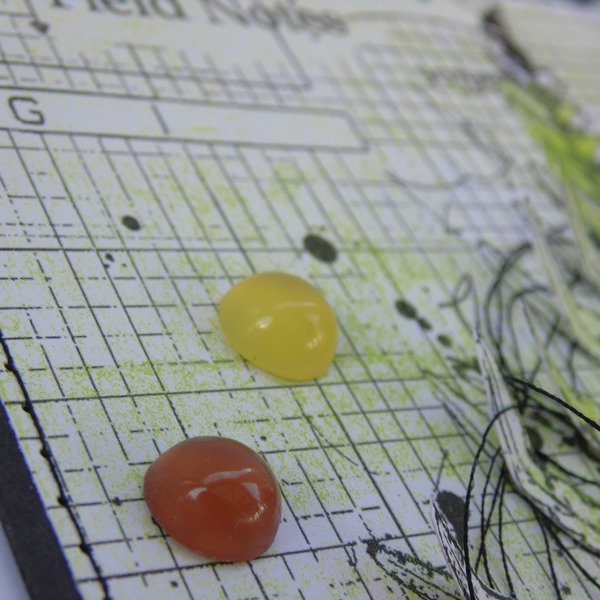
Art Stones add further dimension to my design and cotton threads add more texture.
I machine stitched my artwork to a piece of black card, I love adding stitching to my designs.
I opted for a rusty nail wrapped in twine and surrounded by micro beads for a touch more interest and to give a quirky touch to my piece.
This stamp is perfect for adding a focal image but also for adding small details to your work, there is so much detail in the background alone.
Thanks so much for stopping by. Tracy x x
Here is my A4 stamp used in my card today, available from our stockists.
AALLandCreate Web Page
AALLandCreate Facebook Page
AALLandCreate Fanatics Facebook Page
AALLandCreate Boutique.
Monday, 22 October 2018
Field Notes
Welcome, today I have a card showcasing my A4 stamp Numbered Botanical from AALLandCreate. You can find a list of our stockists HERE, simply scroll down.
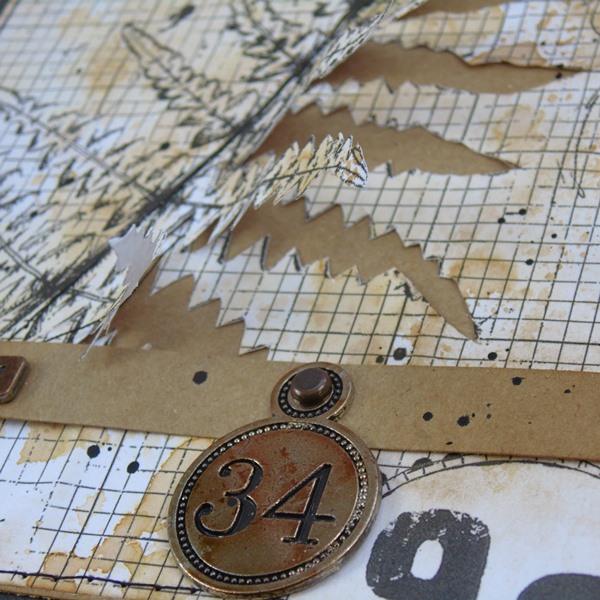
I adore this stamp, the detail is absolutely amazing. I stamped my Fern onto a piece of white card with a grey ink and then cut away one side of the fern and added it to a piece of craft card. Before adding it to the craft card I added a few creases in the card to add to the aged feel of this piece.
I then added Vintage Photo Distress Oxide Ink to my non-stick craft sheet, spritzed with water and then dipped the stamped piece into the ink to add blotches of ink, again to add to that aged feel.
I also included a metal Story Stick which I coloured with Alcohol Inks and added this to a strip of card across the fern.
My Date It Stamp worked perfectly alongside the fern, again stamped onto kraft card.
I also included another metal number embellishment to coordinate with the numbers within my design.
Thanks so much for stopping by. Tracy x
These are the products I incorporated in my design today.
AALLandCreate Web Page
AALLandCreate Facebook Page
AALLandCreate Fanatics Facebook Page
AALLandCreate Boutique.
Friday, 19 October 2018
Love Grows Here
Welcome, today I have a card for you using my latest release with AALLandCreate. This time around I am showcasing my Blossomed Dreams #123 A6 Stamp Set. All the products are available from our stockists, which you can find HERE.
I began by stamping my flower onto a piece of kraft card using White Acrylic Paint and then creating a flower mask and blending Distress Oxide Ink Candied Apple, Fired Brick and touches of Aged Mahogany around the flower. I spritzed the background lightly with water, allowed the water to sit for a few moments and then dried with my Heat Tool.
I then stamped my flower head once again onto kraft card using White Acrylic Paint and then coloured with pencils, adding layers of colour to the petals for definition. I also added some tone on tone stamping using my A4 Numbered Botanical Set, applying Aged Mahogany Distress Oxide ink to the background detail on the stamp and adding random stamping around the background. To add further to the texture I also included some Texture Paste, applied over Autour de Mwa's stencil.
I also included some chicken wire for added dimension and texture along with some hand stitching and Art Pebbles. I also added a mono print using Autour de Mwa's stencil once again, this time applying Black Soot Distress Ink directly to the stencil, spritzing the ink with water and then placing the stencil, ink side down and dabbing with a piece of kitchen towel. I then dried the ink with a Heat Tool. I love the process of adding layers to my designs.
These are the products I used to create my card.
Thanks so much for stopping by. Tracy x x
AALLandCreate Web Page
AALLandCreate Facebook Page
AALLandCreate Fanatics Facebook Page
AALLandCreate Boutique.
Monday, 15 October 2018
Field Notes Etcetera Tag
Welcome, today I am showcasing my A4 Stamp Numbered Botanical from AALLandCreate. All the new products are available from our Stockists, a list of which you can find HERE, simply scroll down.
I opted to showcase my Fern image on an Etcetera tag, enabling me to add lots of layers to my design. I applied lots of texture with Texture Paste and added layers of colour with Distress Paints Antique Linen and Vintage Photo.
I also added some metallic touches using Pebeo Wax and added some touches of Evergreen Bough Distress Paint.
I added layers of stamping and added some dimension by cutting two layers of Fern to add to my design, stamping one in Acorn Archival Ink and one in Evergreen Bough Distress Oxide Ink.
The Art Stones add further dimension to my design and I love the texture from the teture paste which applied randomly with a palette knife and also applied over Autour de Mwa's stencil Lotza Dotz.
I also included some rusty wire and some cotton threads for added texture.
Thanks so much for stopping by.
These are the products used in my mixed media piece today and available now from our Stockists.
Thanks so much for stopping by. Tracy x x
AALLandCreate Web Page
AALLandCreate Facebook Page
AALLandCreate Fanatics Facebook Page
AALLandCreate Boutique.
Friday, 12 October 2018
The Earth Laughs In Flowers
Welcome, today I am showcasing my Border Stamp ##119 Print By Numbers from AALLandCreate. All the new products are available from our Stockists HERE, simply scroll down.
I combined my stamp with Eileen Hull's Passport Book Die along with Seth Apter's Baked Texture Patina Oxide.
I adore the detail in this stamp and when stamped into the powders it looks fantastic. I highlighted the texture further with touches of wax.
I built up several layers of the Baked Texture Patina Oxide and then stamped into the melted powder whilst it was hot, applying VersaMark to my stamp to prevent the melted powder sticking to my stamp.
I added a further spotlight using a second piece of mountboard and again stamping the flower into the melted powder and then placing the second piece over my first image to give dimension.
Rusty wire adds a further element of texture along with some jump rings.
I added melted powder to the back of my book along with some gold trim to the binding.
Thanks so much for stopping by. Tracy x x
This is the stamp set I used in my piece today and available from our Stockists.
AALLandCreate Web Page
AALLandCreate Facebook Page
AALLandCreate Fanatics Facebook Page
AALLandCreate Boutique.
I combined my stamp with Eileen Hull's Passport Book Die along with Seth Apter's Baked Texture Patina Oxide.
I adore the detail in this stamp and when stamped into the powders it looks fantastic. I highlighted the texture further with touches of wax.
I built up several layers of the Baked Texture Patina Oxide and then stamped into the melted powder whilst it was hot, applying VersaMark to my stamp to prevent the melted powder sticking to my stamp.
I added a further spotlight using a second piece of mountboard and again stamping the flower into the melted powder and then placing the second piece over my first image to give dimension.
Rusty wire adds a further element of texture along with some jump rings.
I added melted powder to the back of my book along with some gold trim to the binding.
This is the stamp set I used in my piece today and available from our Stockists.
AALLandCreate Web Page
AALLandCreate Facebook Page
AALLandCreate Fanatics Facebook Page
AALLandCreate Boutique.
Subscribe to:
Posts (Atom)


