Wednesday 31 August 2011

Simon Says Stamp Stamptember BLOG HOP


 For the second year in a row, Simon Says Stamp and Show and The Simon Says Stamp Challenge are joining forces to bring you a SUPER hop and treasure hunt to celebrate the approaching fall and winter holidays.
To help celebrate we will be giving a BIG BASKET OF CRAFTING GOODIES to the winner of this hop! PLUS 3 $25 VOUCHERS to the Simon Says Stamp Store ! The vouchers will be the  hidden treasure on 3 DT blogs and you have to find them.

The Blog hop starts today August 31st, 2011 on the Simon Says Stamp Challenge Blog
and will finish on September 5th, 2011 at on the Simon Says Stamp and Show Blog.

The theme for both challenges this week will be ANYTHING GOES. You can make anything you like … a card, an ATC, a Scrapbook layout … the possibilities are endless!
You will need to hop through each blog, find the little parcel of goodies and make a note on which designer’s blog you found them. You do not HAVE to comment on all the DT blogs but we would appreciate any comments you would like to leave. If you lose your way at any time a full list of all the participating blogs with links will be available on Simon Says Stamp Challenge and the Stamp and Show Challenge blogs.

For more details please refer to the Simon Says Stamp Challenge or the Simon Says Stamp and Show Challenge blogs for more details.
If you arrived here from Lols then you are going in the right direction otherwise you need to start at the beginning on the Simon Says Stamp Challenge.
For the Anything Goes challenge I decided to indulge in my passion for all things Halloween, decorating a configuration box using stamps from Artistic Outpost, Halloween Treats and Apothecary. The configuration box was coloured with Distress Stain Vintage Photo and adorned with some of my vintage finds and stamped images from the Artistic Outpost sets. A crow has been added from Wendy Vecchi's Outdoor Art Parts, coloured with Distress Stain Black Soot to add to that Halloween feel of the whole project.  All the stamping has been aged with Distress Ink Vintage Photo.
A little close up to show the detail of those stamps. I am loving using the labels on vintage bottles.

The top of the box has a skeleton added along with 31 using numbers from the Grunge Blocks, coloured once again with Distress Stain along with some barbed wire ribbon.

I really enjoyed decorating this piece and indulging in a little Halloween!

From here you need to go to the super talented Christine Ousley for more inspiration.

The last stop on the hop is the Simon Says Stamp and Show Challenge blog.  You will need to leave a comment there with the names of the 3 blogs with hidden treasure. The comments will be moderated so you will not be able to see the answers.

Thanks for stopping by and leaving a comment, enjoy the BLOG HOP.  Tracy x 

Sunday 28 August 2011

Steampunk Shadow Box

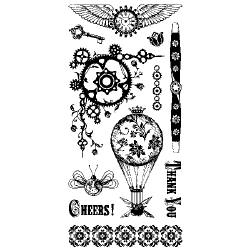
I have been creating with a new set of Inkadinkado stamps "STEAMPUNK" from The Stamp Attic.
I wanted to create something a little different from a card this time around and whilst hunting around my craft room for some inspiration I found the lid from a configuration box and thought what a great idea for a steampunk shadow box and recycling at the same time, PERFECT.
I began by colouring the lid from the configuration box with Distress Stain vintage photo, applying a couple of layers of colour.  I then inserted a piece of card to decorate the back, I covered a piece of thick card with paper from the Crowded Attic paper stash and adhered to the back. I cut a Weathered Clock from Grungepaper using Tim's die and again coloured with Distress Stain vintage photo, adding a little black soot ink to the edges for definition.
I stamped the propeller onto Grungepaper, coloured with Distress Stain vintage photo, added a washer, coloured with rust Alcohol Ink and added just above my weathered clock. My bird is cut from Grungepaper. I used Darcies Free Bird Arcylic shape (not on-line but in the shop) to draw around, covered the Grungepaper with paper from the Crowded Attic Paper Stash, embossed with Tim's Steampunk Texture Fade and coloured the raised areas with Distress Ink vintage photo. I added a metal cog to the wing (not on-line but in the shop) and added the bird to a small piece of wood so that it stood away a little from the inside of the box.  I added one of Tim's Corked Vials adding some small watch parts to the inside and added a label cogs and gears from the new PaperArtsy Hot Picks Clockwork Birds set.
I added one of Tim's Light Bulbs along with some old washers coloured with rust Alcohol Ink. The balloon was stamped onto Grungepaper with black Archival Ink, cut out and added to a small piece of wood to enable it to stand and to give it some stability. I also stamped around the edges of my box with the small cog stamp, again with black Archival Ink.
The side of the box was also stamped with one of the fabulous steampunk pieces from the Inkadinkado set.
I have also added one of Tim's Regal Adornments to the inside of the box along with more stamping of the small steampunk image.
Gadget Gears were added to the top of my box, cut from Grungepaper and coloured with Distress Stain.
I also decorated the back with the same gears.
To complete I added the wings to the top centre of my box, again from the Inkadinkado steampunk set.

Thanks for stopping by and leaving a comment.  Tracy x x


Wednesday 24 August 2011

Domino Accordion.......

For this weeks DT piece for 100 Proof Press using the Long Tower Row stamp, which I love and the detail is fabulous.
I found two very large dominoes in my cupboards and decided to use them as book covers.  Each domino was painted with Fresco paint Little Black Dress, allowed to dry and then I applied the Crackle Glaze, allowed to dry and then applied a top coat of Honey Dew.  I love the crackles this paint produces and so easily too.  I then stamped the Long Tower Row onto the front and back cover. On this side I added a pewter ART embellishment.
On this side I added a CREATE pewter embellishment.
The inside of the book covers were decorated with 7 Gypsies Paddington paper and I then added my accordion which was stamped throughout with the Long Tower Row.
From this picture you can see the fabulous detail in the stamp.  I may even use this stamp for a Christmas card, would look great in icy blues for a winter scene. To complete, I added a ribbon to fasten. Pop by the shop HERE to see some more great ARCHITECTURE stamps.

Thanks for stopping by and taking the time to comment, much appreciated.  Tracy x x


Tuesday 23 August 2011

Age Is Just A Number

Time for my next DT piece for Creative Expressions using the Wrinkles Don't Hurt set of stamps. I decided to use them a little differently this week and created a journal page but you could still use the same elements in a card.
My background is coloured with Distress inks and spritzed with water and I also added a few thick lines of Gesso to add dimension.  I also used a stencil to add numbers to follow the theme of "AGE IS JUST A NUMBER".
I also added numbers printed from my computer.
My image is stamped onto paper and coloured with Distress inks and I have added several sentiments from the set too as they worked quite well with my journal spread.
Thanks for stopping by, Enjoy your week. Tracy x x


Monday 22 August 2011

A Trip To London For Simon Says

Another Monday, another challenge from Simon Says Stamp and Show and this weeks theme is TRAVEL.

As soon as I saw the theme was travel for this weeks challenge I thought of family trips to London and as soon as I found a small case in my crafty goodies that's where my creativity began. The small case has been decorated with crumpled tissue paper and coloured with Distress Stain Vintage Photo, perfect for that aged leather look. The top has been adorned with Tim's Old Jalopy die, coloured with black Adirondack Paint Dabber and Distress Ink Vintage Photo.  The case has been embellished inside and out with stamps from Tim's Collection Mini Muse and Artistic Outpost Loverly London and London Underground.
"The Journey awakens the Soul" is from Tim's Mini Muse set and has been stamped onto Grungepaper, cut out and coloured with Vintage Photo.  I have added a photo of my daughter Laura and my son Ryan to the windows, they love their annual trip to London. "LONDON" is from the Artistic Outpost sets highlighted above.
The inside of my case has been coloured in the same way and has images from the Artistic Outpost sets added.  The flag has been coloured with Distress Stains Faded Jeans and Fired Brick.  I have added old stamps, rusty key, crown and Tim's Film Strip Ribbon to embellish the inside.
JOURNEY has been added to the top, adding letters to Memo Pins adhered with Glossy Accents.
I found an old lock and key, saved from a Christmas cracker which I coloured with Alcohol Ink Espresso and added a small London charm.
Old stamps have been added to the sides of my box along with stamping from the Artistic Outpost set.
I'm so pleased I saved these stamps, I have had them for years and never used them, I love it when I can use something in my creations that I have not used from my crafty stash.  All my elements have been adhered using Claudine Hellmuth Multi Medium Matt.

Pop over to the Simon Says Stamp and Show blog and take a look at my fellow team members they have created some inspirational projects and remember there is also the chance to win a $50 prize from Simon Says Stamp.  I always look forward to seeing your creations each week.
More exciting news too, for the second year in a row, Simon Says Stamp and Show and The Simon Says Stamp Challenge are joining forces to bring you a SUPER hop and treasure hunt to celebrate the approaching fall and winter holidays. Be sure to come back on 31st August to start the hop. It will run through until 5th September. Simon Says Stamp is offering some great prize packages, and there will be other opportunities to win some blog candy too!

Thanks for stopping by, enjoy your week.  Tracy x x

Friday 19 August 2011

A Little Grungy

My Pan Pastels arrived this morning so I could not wait to have a little play.  I decided I would go for an inky, grungy background as I just felt like playing around a little to experiment with my new goodies.  My starting point were the colours from The Play Date Cafe.
I also tried to pick up the harlequin pattern from the inspiration picture in the top corner in my creation.
I have used a mini harlequin stencil in the background along with a mini daisy cluster stencil, adding colour using rhe Pan Pastels, and I must say I am loving these, they are rich in colour and you can add layers of the same colour, brilliant.  Once I had my background sorted I did struggle with the pink element so added a double row of machine stitching in pink around the outside edge and a pink heart to Dina Wakley's Grungy Silhouette.
I also added Dina's Script Heart both stamped in coffee archival ink. I added the sentiment DREAM, BELIEVE, INSPIRE, LOVE for the finishing touch.
A few highlights of white with a gel pen complete my piece and I thoroughly enjoyed just creating my own background and messing around with colour a little.

Thanks for stopping by, enjoy your weekend.  Tracy x x

Thursday 18 August 2011

Winter Wonder

It's been a busy week this week with DT samples and magazine articles so today I thought I would join in a couple of challenges and make a quick card, well it was supposed to be quick but did not quite work out like that, all the best plans and all that!!
Thought I would use one of my new stamps I received from Simon Says, Tim's Silhouettes, I love the background on this stamp set and thought it was perfect used in conjunction with the snowman die, Winter Wonder. I am entering this card into the Grungy Monday challenge where Linda is asking us to use Distress Stickles in our artwork.  I have used Distress Stickles on my snowflakes for this creation.
I have embossed the background with clear embossing and sponged over the top with Distress Ink Broken China with highlights of Faded Jeans, and as my background and snowman are white I would also like to enter into a second challenge, Sunday Stamper with Hels who challenges us to use WHITE in our artwork this week. I have also used Tim's techniques HERE, along with using packaging from one of my Alterations dies, which I have embossed with Tim's Snow Flurries Texture Fade and added over the top of my snowman, which adds great texture and dimension.
Thats another Christmas card off the list, only a 100 to go PHEW!!!!!!

Thanks for stopping by and leaving a comment.  Tracy x x


Wednesday 17 August 2011

Husk Of Hares

Time for this weeks DT piece for 100 Proof Press.  I decided on another journal page this week using the Large Handsome Hares, Small Handsome Hares, Medium Many Line Circle and Clocks, Time Zones.
The background of my pages have been coloured with distress inks and spritzed with water.  I have used a Crafter's Workshop mini harlequin template with gesso to add some layers and highlights of colour.  Numbers have been added for yet a further layer of interest.
The large and small hares have been stamped onto white card and coloured with distress inks and added to my pages. Highlights have been added with a white gel pen throughout.
The Medium Many Line Circle has been stamped randomly accross my pages using coffee archival ink to add yet anothr layer of stamping and again areas highlighted with a white gel pen. The Clocks, Time Zones has been stamped onto white card, coloured with distress ink and added to the pages.
HUSK OF HARE has been stamped with a Papermania alphabet set with coffee archival ink and again areas highlighted with a white gel pen.
Thanks for stopping by and leaving a comment, much appreciated.  Enjoy your day.  Tracy x x


Tuesday 16 August 2011

Wrinkles Don't Hurt...............

................my first stamp set from Creative Expressions and time for my first DT piece.
The stamp set comes with three humerous images and masses of sentiments to go along with each image.  This time around I decided to create a card.
My card is 6" x 6" and to add to the theme I printed a background sheet from the computer of English notes as I thought this was quite apt with the sentiment.  My image has been coloured with Distress Inks tea dye and vintage photo. I have matt the image onto a circle cut using the Spellbinders Nestabilities standard circles. I have sponged the edges of the circle with vintage photo ink to add to the vintage feel of my card.  VINTAGE has been added to jump rings, adhering with Glossy Accents. Tim's Memo Pins also look great when adding letters in this way too.
I have cut two smaller circles using the Nestabilities, placed my image uppermost onto a flat surface and pressed each circle onto an area of the stamp to give me a couple of highlights of the main image, I love doing this in my cardmaking, highlighting the flexibility of stamps in your creativity.  The sentiment has been stamped onto white card with black archival ink and layered onto co-ordinated card.

Thanks for stopping by and leaving a comment, Tracy x x


Monday 15 August 2011

Bling For Simon Says....

It's Monday morning and that can only mean one thing, it's time for my FIRST official DT piece for Simon Says Stamp and Show.  This week we are asking you to show some BLING.
I decided to pull out all the stops for my first DT piece recycling a wired dress form that was damaged, giving me the idea of a MAKE DO AND MEND piece which has been covered in torn paper from an old book and coloured using Broken China Distress StainGrunge Blocks have been added to give dimension to the lettering and lots of Claudine Hellmuth Matte Multi-Medium.  Most of my metal finds for this piece have been coloured with Silver Adirondack Paint Dabber which adds great texture to the wings and metal embellishments.  I have added plenty of BLING with one extra special piece around the bodice's neck, a large amber coloured piece of jewellery.  A girl can never have too much BLING!
I have added a flower to the head to represent a decorative hair piece, cut using the Tattered Florals die using approximately 8 layers to give great dimension to the flower.  I have added more BLING to the centre of my flower using one of Tim's Accoutrements.
I have also made a couple of holes in the bodice using Tim's Drill Punch enabling me to dangle a couple of pairs of brass scissors from the bottom of the dress form.
There is lots more inspiration for you from the SSSS talented DT on the Simon Says Stamp and Show blog. Cannot wait to see your inspirational creations this week and there is even a $50 prize and the Top Three award to win.

Thanks as always for taking the time to stop by and leave a comment.  Enjoy your week.  Tracy x x

Friday 12 August 2011

I'm So Thrilled.....................

.............to have been chosen to be a member of the talented SSSS DT. I have been on cloud 9 since I received the email from Linda and I have still not come back down to earth. I really do get a buzz from participating in challenges so this is a dream for me and I hope that along the way I can INSPIRE you to CREATE.  I would like to thank SSS and the DT for making me so welcome, THANK YOU, I look forward to creating along side you all. I would also like to say a BIG CONGRATULATIONS to Ellen who is also joining me as a new member.

Of course I had to enter this weeks challenge which is to SHOW A TIM HOLTZ TECHNIQUE so I decided to create a tag card as I am really enjoying making these at the moment, they are just the right size not too big!
I have coloured the background using one of Tim's techniques which you can find HERE, which is the challenge for Grungy Monday so I am entering this piece there too, however, I did do my edges a little differently and used Multi Medium Matt to create a resist.  I also decorated a separate piece in the same way and embossed with Tim's Snowflake Texture Fade and  added Clear Rock Candy Stickles to the snowflakes.  I have added a cut piece of packaging from one of Tim's dies to add over the top of my reindeer (Reindeer Flight die) and again I have embossed with the Snowflake Texture Fade.  I have added a little bell to the reindeer, something I saved from a Christmas chocolate decoration last year, I knew I would find a use for them LOL.  To complete the front I have added NOEL bottlecaps and a snowflake which has been coloured with silver Adirondack Paint Dabber.
Here you can see the tag folded card in more detail.  I have added a second reindeer to this side. Both reindeers have also had music paper added to their bodies, cut from an old hymn book. Again I have added recycled packaging to the reindeers body. WISH has been added using Wendy Vecchi's JUST WORD ART set which means I can also add this to the Sunday Stamper challenge which this week is to use WISH in your artwork. I have added two snowflakes using Marianne Creatables die to complete this side.
I have tried to take a close up shot so you can see the packaging I have used for the reindeer's body.
The inside of my tag card uses the Pine Tree die which I have cut from card and music paper and sponged the edges with DI tea dye and vintage photo. I have used the Snow Flurries on the edge die both the positive and negative pieces, no waste here!  The sentiment is from Outlines.  Believe is from the same Wendy Vecchi set.
I have also used an old text stamp which I think is Stampendous to one side of the tag.
Now this was difficult to photograph but if you look really closely you will see that I have added a reindeer, again from packaging to this side, it looks great IRL.
Must admit I have really enjoyed recycling some of Tim's packaging and it adds great dimension to your art.

Thanks for your kind comments on the SSSS blog and for all your warm welcomes, I appreciate them all.  Enjoy your weekend. Tracy x x