Friday 29 June 2012

CELEBRATE THE SEASON

I've been using the fabulous Tall Conifer once again this week for 100 Proof Press to create my second Christmas card of the year. This tree just shouts Christmas and Winter for me.
I created my background using a snowflake embossing folder adding white embossing powder. I applied VersaMark ink to my folder and then embossed the Kraft-Core card stock, sanding the raised areas and edges for further interest.
I cut two circles using the Spellbinders standard circles die and stamped the fabulous trees with black archival ink. I added a little colour with Distress Inks evergreen bough and iced spruce, loving these colours!
To add a little glitz I spritzed with Radiant Rain shimmering mist and added JOY to memo pins for added interest.
I added a lovely wooden snowflake coloured with white acrylic paint and Distress Inks giving fabulous dimension to my card.

Thanks so much for stopping by. Tracy x

Wednesday 27 June 2012

BUTTERFLY GIRL

I was in the need for a liitle colour this week for my Creative Expressions DT piece using the fabulous Butterfly Girl by Sam Poole.
My background has been coloured with the Dylusions ink sprays, I love the bright colour palette.
I stamped the butterfly girl onto white card and then stamped once again onto the Graphic 45 Steampunk Debutante paper. The paper determined the colours I used in my background. For added dimension I have included a brass heart along with dream Chitchat sticker.
I stamped the Bubble Wrap image in the background with black Archival Ink adding a few white highlights to lift the image a little.  I cut two hearts from white card using the Mini Hearts die again colouring with the ink sprays, adding some faux stitching to the outside edge. "If I had wings....." is from Sam Poole's Art Sayings stamp set. For a little more interest I added a few splatters using the picket fence Distress Stain.
I love the heart image from the Butterfly Girl stamp set which I added to the bottom of my tag representing flowers, again adding a few white highlights with a white pen.  I also added dimension to a couple of the hearts stamping the image onto the Graphic 45 paper to match her dress.
The small dotty stamp is also from the Butterfly Girl set, I love this background image its a great filler as I refer to them, again I have added white highlights with my white pen.
It was great to use a little colour for a change and it's good to work outside your comfort zone now and then and this creation made me realise I need to use more colour more often, its great fun.

Thanks so much for stopping by. Tracy x x


Monday 25 June 2012

Depths Of Distress

We are encouraging you to use lots of DISTRESS in your creations this week over at Simon Says Stamp and Show.
I decided to pay homage to PaperArtsy with my distressed inky tag, combining images from Hot Pics 1005 and the Hot Pick Xtra. Lots of layers of Distress Stain and Distress Ink Broken China, Faded Jeans and Vintage Photo add great depth to my background.
I wanted to go for a very distressed, mottled background on my tag so I added Distress Stains picket fence, broken china and faded jeans to my non stick craft sheet and swiped my tag through the ink and then dried with my heat tool, repeating the process until I was happy with the coverage. I stamped the umbelliferous floral in the background firstly with coffee Archival Ink and then black to add further layers of interest.
I added the collaged flowers from PaperArtsy's Hot Pick Xtra set stamped with black Archival Ink and coloured with faded jeans and vintage photo ink.  To lift the flowers a little from the background I added white dots using a white gel pen also adding them to the edge of my tag, just this little touch makes so much difference and the dots coordinate with those on the two floral stamps. For added dimension I have included a metal flower from the Idea-Ology Foliage to one of my flowers and a Philosophy Tag to the second. "Flight" from the Chitchat stickers was a perfect addition to work alongside the bird images.
I stamped the bird image onto white card using faded jeans and a little vintage photo ink to blend with my background and stood him on a trim cut from white card using the Vintage Lace die, coloured with vintage photo ink. "fly" was added to my bird's body, again from the Chitchat stickers, colouring with faded jeans ink.  For added texture and interest I added FLY using the Word Play die cut from Metal Foil Tape and embossing with the Regal Flourishes Texture Fade. I coloured the metal with a little pitch black Alcohol Ink and then sanded to give an industrial feel. A little coordinated ribbon tied to the top adds the finishing touch.

For more great ideas please pop over to the Simon Says Stamp and Show blog and take a look at my fellow team members they have created some inspirational projects. Remember there is also the chance to win a $50 prize from Simon Says Stamp.  I always look forward to seeing your creations each week.


Thanks so much for stopping by and leaving a comment, much appreciated.  Enjoy your week. Tracy x x  
 

Sunday 24 June 2012

DREAMS

I decided to get a little creative with the fabulous VINTAGE set by TJ Designs from The Stamp Attic.
The background was created using one of the new Distress Ink colours salty ocean mixed with a little vintage photo.  I applied the colours to my non stick craft sheet, spritzed with water and mopped up the ink with my card, drying each application and then repeating the process until I was happy with the coverage. I then machine stitched my background onto a piece of vintage ink coloured card.
I stamped the DREAMER image with black Archival Ink onto white card and coloured with vintage photo Distress Ink to give that vintage feel. I then backed my image onto a piece of card from the Lost and Found Paper Stash, tearing the bottom edge to give that aged feel. For added dimension I added a Word Band, coloured with a little Alcohol Ink to blend with my piece, adding a little Idea-ology Foliage for added interest.
I added a piece of Film Strip Ribbon secured in place with a fastener, adding YESTERDAY to the top, stamped onto white card and coloured with vintage photo ink. For the WOW factor I added one of the fabulous Wendy Vecchi Embellish Your Art pieces adding a Chitchat sticker to the top. To give a little more of a vintage feel I included some of the fabulous new Ribbons which I stitched into place using my sewing machine.
I also included two hearts cut using the Mini Hearts Set, colouring with salty ocean ink, adding vintage photo to the edges of each heart. To give a little more interest to the hearts I added the stamped crown from the Vintage set of stamps.  To complete, I added an Adage Ticket (DREAM), coloured once again with vintage photo ink to the top corner along with a second Chitchat sticker to my DREAMER image.

Thanks so much for stopping by. Enjoy your Sunday. Tracy x x


Friday 22 June 2012

Brrrrrrr!!!!

I know its a little early to be posting a Christmas card but when I saw the Tall Conifer from 100 Proof Press it was just crying out to be used for a Winter/Christmas card.
I stamped the snowflake background with faded jeans Distress Ink, spritzing with a little water. I then cut a circle from white card and stamped the Tall Conifers creating a snowy scene with Distress Inks.
I also added a couple of Tim's Christmas embellishments for added interest and dimension.
I cut a Tattered Banner and added Merry Christmas stamped with faded jeans Distress Ink, adding a little colour to the edges.

Thanks so much for stopping by. Enjoy your weekend. Tracy x x

Thursday 21 June 2012

DREAMS

I've been getting a little inky with Sam Poole's Art Sayings and Wendy Vecchi's Art Fit For A Queen and Love to Make Art stamp sets from Creative Expressions.
I stamped the background with the stripes from Wendy's set in coffee Archival Ink and then stamped the leaves with a VersaMark ink pad and embossed with clear embossing powder.  Wild honey and spiced marmalade ink was then blended over the embossed image which then resists the ink, something I love.
The fabulous bottle is one of Wendy Vecchi's Embellish Your Art embellishments which I coloured with Alcohol Ink. The fabulous sentiment is from Sam Poole's Art Sayings set which I also coloured with wild honey and spiced marmalade ink. I also added the white bird again from the Embellish Your Art range which I coloured with Distress Markers.
I stamped the flower with coffee Archival Ink and coloured with wild honey and spiced marmalade inks and then layered together to add dimension.  The leaves were stamped with peeled paint and pine needles ink and added to my flower stem.

Thanks so much for stopping by. Tracy x x

Wednesday 20 June 2012

Artistic Outpost Monthly Blog Hop

Yet another month has passed by and here we are again with the monthly blog hop for Artistic Outpost.
This month we are showcasing the fabulous APOTHECARY and GATSBY plates. My altered tin uses the Apothecary plate.
I coloured my tin with ginger Alcohol Ink and then began layering my images inside the tin.  First of all I stamped the large poison bottle which I stamped onto Grungepaper and then coloured with vintage photo Distress Ink.  For added texture and interest I added Clear Rock Candy crackle and then blended more vintage photo into the cracks. The small bottle on the right is from Wendy Vecchi's Embellish Your Art embellishments, again coloured with Alcohol Ink and adding "potion" to the bottle which I inked with black soot Distress Marker as I just wanted this word in particular from the sentiment. I added some spirals of rusty wire to represent a warning bit like barbed wire as in danger!
I added the background receipt stamp to the back of my tin and then added some rusty wire and chicken wire for that WARNING again, bit like you get barbed wire around factories etc (am I making sense LOL!). I also added the wire so that I could achieve different layers within the tin.  I added my gentlemen (the chemist mixing these potions) stamped with black Archival Ink and coloured with vintage photo ink.
I love all the bits and pieces of text and wording you get with this plate, perfect for layering and adding interest.

My fellow Design Team members have created some fabulous pieces, pop along and be inspired along the way.


Artistic Outpost are also holding a fabulous Referral Program, the theme being MASCULINE. Why not pop along HERE for all the details and there is a fabulous prize on offer too.

Thanks so much for stopping by and leaving a comment. Enjoy the rest of the week. Tracy x x 

Monday 18 June 2012

A Bit Of Brown

Simon Says Stamp and Show challenges you to use a BIT OF BROWN in your creative pieces this week, I love brown and use it almost every day in something I create.

An inky background combined with the Woman Filmstrip from PaperArtsy are showcased in my artsy piece this week.  Distress Inks broken china, faded jeans, chipped sapphire and a touch of vintage photo set the background scene.
To create my background I added the Distress Inks to my non stick craft sheet, spritzed with water and swiped my card through the ink, drying between each application.  Once I was happy with the coverage, I added a little vintage photo to my non stick craft sheet spritzed with water and gently dabbed my card into the ink to give splodges of brown, adding to the interest in the background. For further interest I also stamped the Kaiser Numbers Texture stamp to the background in coffee Archival Ink.
To add a little dimension to my creation I added two copper Memory Frames, stamping the PaperArtsy image onto the Frosted Memory Glass, colouring with a little sail boat blue and denim Alcohol Ink, adding a little rusty wire for further texture and interest.
I cut a number 6 from the bottom corner using the Cargo Stencil Number Set dies to coordinate with the stamped numbers in the background and the numbers on my Mini Bingo Card. Further embellishments come in the form of the Mini Numerals from the Idea-ology range, again using the number 6 and colouring with Alcohol Inks and attaching with jump rings.  I added a small piece of Film Strip Ribbon to coordinate with the stamped image adding LIVE using Alpha Parts to match LIVE on the Mini Bingo Card.
The central image has been stamped onto white card and coloured with Distress Inks highlighting the dimension to the other pieces and balancing out the images, I love using 3's and 5's when adding stamped images just works for me!  I also added a little colour to the Mini Bingo Card to tone with my background.
I also love the fact that you can see the numbers through the coloured glass, its these little touches that make a creation for me.

For more great ideas please pop over to the Simon Says Stamp and Show blog and take a look at my fellow team members they have created some inspirational projects. Remember there is also the chance to win a $50 prize from Simon Says Stamp.  I always look forward to seeing your creations each week.

Thanks so much for stopping by and leaving a comment, much appreciated.  Enjoy your week. Tracy x x  


Sunday 17 June 2012

MEMORIES

I thought I would try my hand at Tim's tag for June this time around using an image of  me when I was around 4 years old. All the products I've used are available from The Stamp Attic.
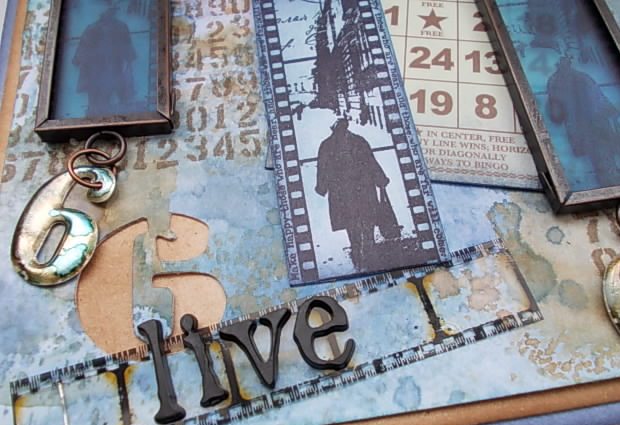
I did my background a little differently to Tim's and used one of the NEW Distress Ink colours salty ocean which I have to say is a gorgeous colour.  I applied my ink to my non stick craft sheet along with picket fence Distress Stain and swiped my tag through the ink and dried with my heat tool.  I repeated this process until I was happy with the coverage and then spritzed with a little water. I also used a different stamp in the background to Tim, I decided on the numerals from Wendy's Art Parts stamp set as I thought this was perfect as this tag showcases me at the age of 4.
Yet again I improvised with my colouring and used fired brick Distress Marker which worked rather well for tinting my photograph. I then added my photo to a piece of paper from the Lost and Found Paper Stash, ageing with a little vintage photo ink and distressing the edges with the Paper Distresser.
As this picture features me when I was four I thought I would add one of the large Numerals fastened with long fasteners to secure. Like Tim I also added a Word Band coloured with a little snow cap Paint Dabber. I also love how the Pen Nibs have words engraved and this one has memoirs added.
For further interest and texture I also added some of the fabulous NEW ribbon that Wendy has in stock, really adds to that vintage feel.
As with Tim's tag I have added the leaves from the Idea-ology Foliage to one of the flowers from the Lavish Trimmings coloured with the new salty ocean ink.
Film Strip Ribbon has been added to the top of the photograph secured in place with a Gem Clip and for added dimension I also included PHOTO added to jump rings adhered with Glossy Accents.
Attached to my photograph is a File Tab again with the number 4 added and for further interest a small star has been added from the Adornments Charms attached with a jump ring. To add to the vintage feel of the tag I also blended a little vintage photo ink along the edges of my tag.
Wendy normally has the samples I complete for the shop, mmmm wonder whether she will really want this one with my little face staring back at her lol!!!!

Thanks so much for stopping by, Tracy x x


Friday 15 June 2012

A Generic Bird

Signing in with a quick post this evening showcasing the fabulous Generic Bird Diagram once again from 100 Proof Press.
I created a HUGE tag (I am loving this size of tag at the moment, available from Linda at The Funkie Junkie in her new Zibbet store), so much space to get creative.
I coloured my tag with Distress Stains, applying them to my non stick craft sheet and then swiping my tag through the ink, drying and then repeating the process. Once dry I then spritzed with water to give a mottled effect.  I then stamped the Generic Bird Diagram onto the card with Distress Ink and then a second and third time so that I could add dimension to my bird and wing. I coloured my bird with Distress Inks and added a crown, cut from card using the mini crown and fleur set which I cut down slightly to fit. I also added the fabulous sentiment from Artistic Outpost which I thought fitted the Generic Bird perfectly.
I had some vintage lace trim left from a previous project cut using the vintage lace die which I coloured with a spritz of reinker and Perfect Pearls mix, I love the shimmer this adds to a project but very difficult to capture on a photograph.
For added interest and dimension I cut a heart from card using the mini heart die coloured with broken china and vintage photo Distress Inks, adding SOAR to the top, cut from the Artistic Outpost sentiment.  I added a little bird charm from Tim's Idea-ology, adding twine and a jump ring to fasten.

Thanks so much for stopping by.  Hope you all enjoy your weekend. I have a busy weekend ahead with many creative deadlines to meet, which should be a challenge in itself as I am out tomorrow and Sunday for Father's Day.  Could be a few late nights on the cards lol!!

Tracy
xx


Thursday 14 June 2012

If I Had Wings

I'm really enjoying decorating these huge tags at the moment and decided to decorate one using the fabulous Art Sayings and Birds A5 stamp sets by Sam Poole from Creative Expressions.
I stamped my background with text using black Archival Ink, dried with a heat gun and then stamped the bird images with a VersaMark stamp pad and embossed with clear embossing powder, then adding broken china Distress Ink, with a little faded jeans to the edges.
I cut two hearts from white card, stamped my images with black archival and coloured with broken china ink, matt and layering each heart onto a second heart coloured with vintage photo Distress Ink and distressed along the edges.
"If I had wings" is from Sam Poole's Art Sayings set again stamped onto white card and coloured with a little broken china ink.  I also added a coordinated ribbon to the top of my tag along with the bird postage stamp from the Birds plate.
I repeated the sentiment and added to the bottom of my card.  You can also see the resist technique much better in this picture.
For added dimension I also added one of the fabulous Wendy Vecchi Embellish Your Art embellishments.

Thanks so much for stopping by, Tracy x x