Showing posts with label Vintage. Show all posts

Wednesday, 8 June 2022

Robin Christmas Card

Morning everyone, hope you are well.

Today I am popping by with a seasonal card using my Robin and Nuthatch A6 Stamp Set.

I love the vintage tones on this piece which I created with Distress Oxide Inks. This card is part of one of my on line workshops. There are several cards in this workshop along with a book.

This close up shows the detail of the background and the beautiful layered elements.

I added a few stars to the backdrop and then added touches of background stamping with my background stamp from my A5 Follow Your Own Path.

I now have another card for Christmas to add to my selection.


 See you all soon.

Tracy

xx


Wednesday, 23 May 2018

Let Your Dreams Blossom

Hi and welcome to another blog post using my stamp set #44 from AALLandCreate, which is available to purchase HERE.
I have reverted back to my love of all things vintage with this piece. I love using vintage tones in my artwork.
I began by adding low-tack tape around the edges of my kraft card and I then blended Dina Wakley White Acrylic Paint around the centre aperture, blending the paint with my finger. I then applied a layer of Turquoise Acrylic Paint around the edges, blending in towards the centre of the aperture, again blending with my fingers. I then added a light touch of Ocean Acrylic Paint with my finger, lightly around the very edges of the aperture. These layers add shading and definition to the design.
I then added a light dusting of 'A Bit Jaded' Infusions to the centre and spritzed lightly with water. This gives a little more detail to the design. I then removed the low-tack tape and then added some doodled lines around the edges of the aperture.
I then stamped my quirky flowers onto some book pages, cut out the flower heads and then added them to the same stamped image on my card, stapling the flower heads into place with my Tiny Attacher, giving yet a further little detail to my design.
I also added a touch more detail to the background using my border stamp, love this one and you can find it HERE. This background stamp is perfect for adding touches of detail to the background of a piece of work and the heart on the border stamp works beautifully as a focal image. I also added some delicate splatters of white paint for further interest along with an Index Clip and sentiment.
Thanks so much for stopping by. Tracy x x


I designed the stamps so that they would all work together and I am so delighted with the outcome.

AALLandCreate Boutique
AALLandCreate Webpage
AALLandCreate Facebook Page
AALLandCreate Fanatics Facebook Page.


Wednesday, 16 May 2018

Trust Your Wings

Hi and welcome, today I have a post showcasing my butterfly stamps from AALLandCreate.
A simple design this time around but still packed with lots of layers and interest.

  1. Mask the top and bottom areas of your card (my piece measures 4.5" x 6.5") with low tack tape so that just the centre panel is visible.
  2. Blend Distress Oxide Vintage Photo Ink across the centre panel, applying the ink with an Ink Blending Tool or a piece of Cut 'n' Dry Foam.
  3. Ink your background stamp, in this case I used Kassa Hayselden's stamp which you can find HERE with Black Archival Ink and stamped into the central aperture area.
  4. Using a wet paintbrush start to paint some of the open areas in the background stamp with the water, allow the water to sit for a few seconds and then dab with a piece of kitchen towel. This gives bleached out areas to the background. Repeat this process across the background stamped area. Dry with a heat tool.
  5. Remove the low tack tape.

I then adhered a piece of vintage music paper to a piece of white card and then stamped my butterflies onto the music paper. You can find my butterfly stamp HERE. I then cut out each of the butterflies and then coloured each one with Distress Oxide Ink.
For added dimension and interest I also included two vintage pen nibs to their bodies.
I stamped the sentiment Trust Your Wings, twice onto white card and then added to the decorative panel. I also included a few delicate splatters of white paint for a further layer of interest and then dried with a heat tool.
Even with a simple card you can add lots of interest to draw the eye in to the focal imagery and design elements.
I also included some rusty tin wire, which I stapled into place and added some delicate splatters of black paint.
Thanks so much for stopping by. Tracy  x x

AALLandCreate Facebook Page
AALLandCreate Fanatics Page
AALLandCreate Webpage
AALLandCreate Boutique

Thursday, 16 February 2017

The Sweetest Thing

Back today with a vintage piece.
I used Tim's Winged Things stamp set for this piece on a backdrop created with a layer of Antique Linen Distress Paint and Distress Crayons Tumbled Glass and Vintage Photo.
A touch of stencilling has been added to the backdrop using one of Tim Holtz new Mini Layering Stencils and I then blended more Distress Crayon across the background and stencilled areas.
She stands on a layer of corrugated card which has been painted lightly with Antique Linen Distress Paint.
I also added a circular piece of rusty tin wire and she is holding a vintage pen nib.
I have added tape nestled behind the corrugated card along with a few remnant rubs. I also included a piece of Film Strip Ribbon which also has a Remnant Rub Added. A little red heart adds a pop of colour.
A SWEET Flashcard adds a little more interest, I crumpled the card and then coloured with Distress Crayon to highlight the creases and add to the vintage/aged feel.
I added delicate splatters of white paint for an added layer of interest.
Thanks so much for stopping by. Tracy x x


Sunday, 18 December 2016

Stay Curious

I had a play day recently just for fun with a friend and these are the results.
It was fun to just play for no reason but fun. The idea was to combine vintage finds with any of our craft items and mediums. I altered an old cigar box using DecoArt Media products, Relic Pieces and Prima Artisan Powder along with added embellishments and bits and pieces.
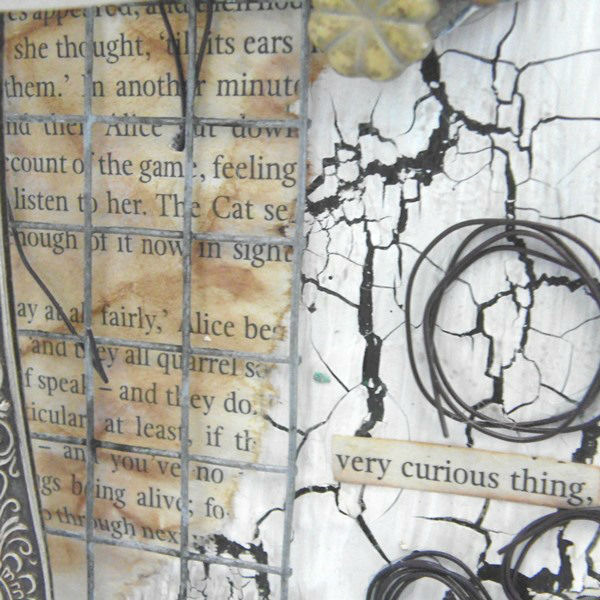
The spoon which holds the Relic piece was from a car boot sale, I love the edge detail on the spoon. Torn papers and wire are added to a torn piece of Alice in Wonderland book page. The beads are from an old set of earrings.
I aged the Relic piece and the spoon with the Prima Artisan Powder and backed everything onto a Mega Crackle backdrop using DecoArt Media products.
I also included an old door handle which fitted perfectly over the spoon along with some circles of wire for added texture.
The book page was aged with Vintage Photo Distress Ink.
The text "Blessed are the curious for they shall have adventures" is computer generated. The picture is from one of my vintage shopping trips along with the cherub and mushroom.
The hessian added behind is for added texture to the design, I love adding texture to  my work.
A little fairy added to the top of the cherub and metal leaves added from an old necklace.
A rusty heart and moss add further texture.
The cigar box is surrounded by crackle texture.
Thanks so much for popping by. Hope you are all enjoying the festive build up to the big day. Tracy x x


Friday, 5 February 2016

A Vintage Journey - February Challenge - Industrial

Welcome to a new challenge with A Vintage Journey, our theme this month is INDUSTRIAL, for all the details pop by the BLOG.
I took this opportunity to make something for my hubby for Valentine's Day, something a little different from a card; an altered frame. I began by painting the frame with DecoArt Media Fluid Acrylic Paynes Grey, dried with my heat tool and then applyd a coat of Patina Green Antiquing Cream and I then rubbed over the frame gently with a baby wipe to remove some of the cream and reveal the darker colour below and to add to the aged feel. I then added touches of Transparent Yellow Iron Oxide (Andy Skinner has the Copper Patina Technique HERE in his video).
I then embossed a piece of Metal Foil tape with a Tim Holtz Texture Fade and added the tape to a wooden heart.
I added Black Soot Distress Paint to the heart, applying with my finger.
The excess paint was removed with a piece of kitchen towel.
The black paint gives the heart a fabulous industrial look combined with the Metal Foil Tape.
I then took some time to decide on  my layout, adhering torn book pages from an Alice in Wonderland book to the background. I then added the industrial heart to the frame adhered to a circle of rusty wire. I also included touches of chicken wire from my garden to add further to the industrial feel; adding zing glass beads for added texture and interest.  Delicate splatters of Fired Brick Distress Paint have been added for a pop of colour.
I added a Found Relative to an old circular piece from a watch part and included a jump ring to his eye and Remnant Rub for a further layer of interest.
A touch more Idea-ology with the mini Sprocket Gears along with a "love" ChitChat sticker.
I continued with the layers, adding Film Strip Ribbon and more Remnant Rubs.
I love adding layers to my design and each layer being visible; the delicate splatters of red really pop against the more industrial elements.
To complete my design I added an old pen nib for added dimension.

I would also like to enter this into the Anything But Cute Mixed Media Challenge which this time around is Grungy Love.

Thanks so much for stopping by, I look forward to seeing your entries into our February challenge.

Tracy x x