Hi and welcome to another post just for fun, this time a mixed media canvas.
I began by applying a layer of Dina Wakley's Heavy Body Acrylic Turquoise Paint onto the canvas, applying with a large flat brush. I then added a layer of Ocean paint to a piece of watercolour cardstock and then pressed the painted watercolour card stock onto the canvas, just kissing it against the background, this is often referred to as monoprinting. I repeated the same process with Tangerine Heavy Body Acrylic to add a further layer. I repeated these two steps until I was happy with the layers I had achieved.
I die cut Seth Apter's Sunburst from the watercolour cardstock pieces I had used to create the monoprinting in the previous steps. I added three layers to my sunburst to create a more sturdy piece.
I added a few delicate splatters of black paint combined with some Remnant Rubs and a RELIC Quote Chip for added dimension and interest.
A clay face has been added to the centre of my sunburst, adding touches of paint to the clay face with my finger and then wiping back any excess to give an aged appearance. I then added some cotton threads behind for added texture.
A few rusty elements add further interest to my piece, I love adding vintage touoches to a design.
I added relic using computer generated text to my face along with a FRAGILE Remnant Rub.
Thanks so much for stopping by. Enjoy your weekend.
Tracy
xxx
Showing posts with label Spellbinders. Show all posts
Saturday, 27 January 2018
Friday, 7 July 2017
A Vintage Journey Challenge - All Squared Up
Hello and welcome to a new challenge for A Vintage Journey. This month I am your host and my challenge is 'All Squared Up'.
Our sponsor this month is the fabulous Tando Creative who are offering an MDF Package for one randomly drawn winner.
I opted to decorate one of Tim Holtz Etcetera Tags.
I love that you can throw anything at these tags, any mediums and they work perfectly.
I began by applying Grunge Paste over the Screwed Layring Stencil and the Tiles Layering Stencil to add texture to the background and I then applied a coat of Gesso.
I then began layering my colours first applying a coat of Old Paper Distress Paint and whilst the paint was still wet I then applied touches of Brushed Corduroy Distress Paint over the top blending the colour with my brush.
Once I was happy with my layers of colour in the background I then began to apply a touch of colour with Broken China Distress Crayon, scribbling the crayon onto the surface and then blending with a damp baby wipe.
For my focal image I used an image from Tim's Etcetera Paper Stash and I die cut the image using Seth Apter's Robo Square Die adding a couple of layers of the die to make it more sturdy. I then die cut two of the other squares from the Robo Die, coloured them with Gathered Twigs Distress Ink and then added them over the top.
I added some burlap to the back of my focal image along with some cheesecloth, to give added texture and further layers to the design. I hung one of Finnabair's rusty clock pieces from a Hitch Fastener and added another vintage image to the centre.
I love all the layers in this piece, making it so tactile. I also included a few pieces of Tim's Idea-ology for added texture and dimension.
My trademark rusty wire had to appear somewhere and I used a circle of wire to showcase the focal image further and added 'be authentic' Quote Chip.
I tucked a tag behind my layers die cut using Tim Holtz Tiny Tabs and Tags Die. A few delicate paint splatters and scratchy lines complete my design.
Thanks so much for stopping by. I look forward to seeing all your entries into the challenge this month.
Tracy x x
"Whether a frame, embellishments, die cuts, drawn squares, doodles, or windows, let's see where inspiration takes you, let's get all squared up and show how creative those right angles can look! Show us your squared up pieces in a vintage, shabby, mixed media, art journaling, industrial, timeworn or steampunk style".
I opted to decorate one of Tim Holtz Etcetera Tags.
I love that you can throw anything at these tags, any mediums and they work perfectly.
I began by applying Grunge Paste over the Screwed Layring Stencil and the Tiles Layering Stencil to add texture to the background and I then applied a coat of Gesso.
I then began layering my colours first applying a coat of Old Paper Distress Paint and whilst the paint was still wet I then applied touches of Brushed Corduroy Distress Paint over the top blending the colour with my brush.
Once I was happy with my layers of colour in the background I then began to apply a touch of colour with Broken China Distress Crayon, scribbling the crayon onto the surface and then blending with a damp baby wipe.
For my focal image I used an image from Tim's Etcetera Paper Stash and I die cut the image using Seth Apter's Robo Square Die adding a couple of layers of the die to make it more sturdy. I then die cut two of the other squares from the Robo Die, coloured them with Gathered Twigs Distress Ink and then added them over the top.
I added some burlap to the back of my focal image along with some cheesecloth, to give added texture and further layers to the design. I hung one of Finnabair's rusty clock pieces from a Hitch Fastener and added another vintage image to the centre.
I love all the layers in this piece, making it so tactile. I also included a few pieces of Tim's Idea-ology for added texture and dimension.
My trademark rusty wire had to appear somewhere and I used a circle of wire to showcase the focal image further and added 'be authentic' Quote Chip.
I tucked a tag behind my layers die cut using Tim Holtz Tiny Tabs and Tags Die. A few delicate paint splatters and scratchy lines complete my design.
Thanks so much for stopping by. I look forward to seeing all your entries into the challenge this month.
Tracy x x
Labels:
A Vintage Journey,
Etcetera,
Idea-ology,
Mixed Media,
Ranger Inc.,
Seth Apter,
Sizzix,
Spellbinders,
Tag,
Tim Holtz,
Tracy Evans
Thursday, 8 June 2017
AALLandCreate Exclusive Product Release
I am absolutely delighted to have a second release of new stamps and coordinated stencil with AALLandCreate. A huge thank you to Autour De Mwa for all his hard work in coordinating everything and making all this possible. THANK YOU.
Stamp Set - Available HERE
Stencil - Available HERE
Stamp and Stencil - Available HERE
You can find my first stamp release HERE.
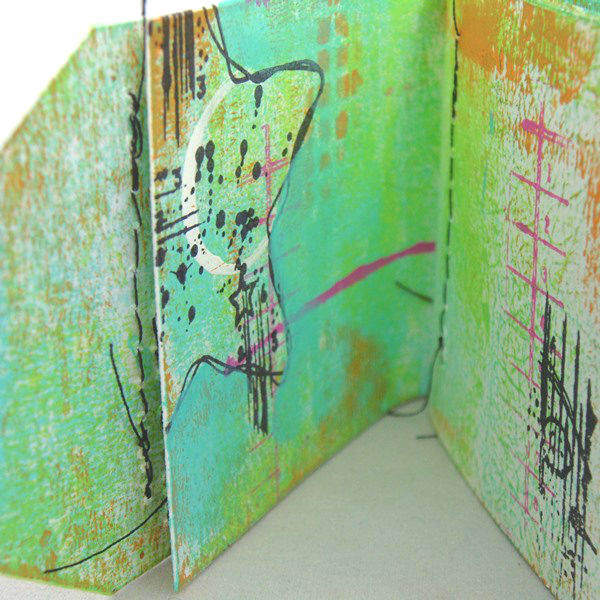
I was so excited to create my first sample using my new stamps and I began with a mini tag book using Tammy Tutterow's Spellbinders Mini Tag Book Die.
I coloured the background of my pages with Dina Wakley Heavy Body Acrylics Lime and Turquoise.
I then stamped my heart stamp with Black Archival Ink and then used my finger to blend Turquoise Heavy Body Acrylic around the heart.
I decorated each page in the same way using all my stamps from my stamp set. I added markings using stencils and a credit card with Tangerine and Magenta Heavy Body Acrylics.
I added my hand drawn sentiment to the left hand side of this page and also added some random machine stitching for added texture.
I love these colours together combined with a touch of white to lift the whole page.
I used part of my imagery on this page along with some more markings and random machine stitching.
I love this star, I can see I will be using this for some Christmas makes too.
I love using circles in my designs so I knew I had to include a circle in my stamp set.
I love working with these colours, one of my favourite combinations.
AALLandCreate also have a Facebook Page which you can find HERE should you wish to show any of your artwork using our stamps.
The pages of my book have all been tied together with coordinated twine and I also added touches of black stamping for further detail.
Thanks so much for stopping by. Tracy x x
Subscribe to:
Posts (Atom)

