Thursday 26 November 2015

Toy Emporium

This week I am showcasing the newly released Toy Emporium stamp set from Artistic Outpost.
I wanted to create something a little different this week and decided to create a shadow frame using Tim Holtz Pocket Watch Frame die combined with Eileen Hull's 3D Die; which worked perfectly with the Artistic Outpost imagery.
The inside of the clock acts as my shadow box to showcase the adorable little girl from the Toy Emporium stamp set. I added a touch of colour to the imagery using my Polychromo pencils. I also created a mask of the girl before adding the background stamping.  I also included some delicate paint splatters using Fired Brick Distress Paint. To add further to the vintage feel I applied a coat of DecoArt Crackle Glaze and then rubbed over the cracks with Raw Umber Antiquing Cream, removing the excess with a baby wipe.
I added the dimensional clock to a chunky ATC which I painted with Fired Brick Distress Paint and then covered with a coat of DecoArt Crackle Glaze, once again ageing further with Antiquing Cream. I also added some foliage and a mini Christmas Tree for added interest.
As I started to put my pieces together I decided to add rusty wire around the edges of the front piece before thinking about how I would adhere this to the dimension clock piece. In the end I decided to cement them together using DecoArt Crackle Paste, which worked perfectly. I applied Antiquing Cream to the Crackle Paste once dry just to age a little.
A touch more foliage has been added to the top along with a few berries to add to the seasonal charm.
When I die cut the pieces I did add decorative paper to the Eileen Hull's 3D Die before assembling, so that the decorative paper appeared on the inside of the clock.

Thanks so much for stopping by. Tracy x x

Friday 20 November 2015

Christmas Angel

I took some time out from deadlines and DT commitments to just have some fun and decided to join in with Sandra Evertson's Merry Christmas Ornament Challenge.
I decided to create a Christmas Angel. She is covered in book pages from an Alice in Wonderland paperback.
This is what I started with. I removed the head and replaced with a dolls head.
The paints I used are DecoArt Fluid Acrylics Cobalt Teal Hue, Yellow Green Light for the body and wings and Burnt Umber with a touch of Quinacridone Gold with a base coat of Titanium White for the head. I applied the Titanium White first as the base coat allowed to dry and then roughly applied a mix of Burnt Umber mixed with a touch of Quinacridone Gold over the top, dabbing off the excess paint with a baby wipe.
I was pleased with how the face turned out and I added a few Remnant Rubs for added interest. I also gave her a crown which I found in an antique store and coloured with touches of Treasure Gold Waxes.
Around her neck she is wearing a Sandra Evertson Prima Relic Chandelier Pendant Embellishment attached with rusty wire.
I love how the book pages are still visible under the paint. I added computer generated text along with some DecoArt Crackle Glaze randomly to the wings and body. I used a Pitt Pen to highlight the text around the edges.
Snowflakes have been added using Tim Holtz Layering Stencil and Texture Paste. I also added delicate splatters of Titanium White to the backdrop.
I love all the layers that are clearly visible, the book pages, the Texture Paste element, painted layers and Remnant Rubs.
ChitChat Stickers have been added to one wing and I have added rusty wire around each of the wings for added texture, secured into place with a Tiny Attacher.
I die cut snowflakes from copper sheets die cut with Tim Holtz Stacked Snowflakes Die and added snowflake embellishments to the top. I heated the copper until it changed colour, you can't see from this picture but the copper really does have an array of colours from heating.
I really had fun making this piece...now back to the deadlines!

I would also like to enter my Christmas Angel into the following challenges:

 Anything But Cute Challenge - "It's Ornamental"

Thanks for stopping by. Tracy x x


Thursday 19 November 2015

Fashioned Embroidery Hoop

I am showcasing the fabulous Vintage Fashion stamp set once again from Artistic Outpost.
I decided to do an altered embroidery hoop this week, which I thought was a perfect fit for the imagery and once again I have gone for a UK/London theme. The background is a piece of Tim Holtz Correspondence Paper Stash which I added to a thicker piece of card to make it more rigid and able to take any paint and sprays I added in the next stages. I then spritzed the background lightly with Hickory Smoke Distress Spray Stain and dried with a heat tool. The embroidery hoop itself was painted with DecoArt Media Fluid Acrylic Dark Grey Value 3 and I then added delicate splatters and scratches with an old credit card using DecoArt Fluid Acrylic Cadmium Red Hue.
I added some Correspondence Tissue Tape across the centre of the panel for a further layer of interest and added a small stamped Union Jack from the Loverly London stamp set, which I coloured with Distress Markers Faded Jeans and Fired Brick Distress Markers; applying them directly to the stamp.
I stamped the background stamp from the Vintage Fashion stamp set onto a piece of Correspondence Paper Stash using Ground Espresso Distress Ink and then over stamped with the elegant lady in Black Archival Ink and then dried with my heat tool. I added the stamped piece to a Tim Holtz Foundary Frame which I coloured randomly with my finger using Cadmium Red Hue Fluid Acrylic and dried with a heat tool.
LONDON text from the Loverly London stamp set was stamped on to the background panel; adding the text Fashion below from the Vintage Fashion stamp set, both stamped with Black Archival Ink. I added delicate splatters of Cadmium Red Hue to the background along with more scratchy lines.
The three bodice images were stamped onto Correspondence paper, cut out and added to the hoop; adding shading around each bodice with a Hickory Smoke Distress Marker; scribbling the marker onto a non-stick craft sheet and picking up the ink with a water brush.
I love how all the layers are visible below all the paints and inks and papers.


Thanks so much for stopping by. Tracy x x x


Tuesday 17 November 2015

Eileen Hull Art With Heart Challenge - New Release

Welcome to my third post of the month for Eileen Hull's Art With Heart Challenge and this month we have something special....a new release! You can find the whole release HERE. Our Challenge this month is A STITCH IN TIME and you can intepret in anyway you like.
This week I have used the Needle Book and the Button Jars and Labels dies. I wanted all my pieces for the new release to all coordinate so once again these pieces have been coloured with Vintage Photo Distress Ink.
I added the Button Jar to Eileen's Cookie Box and I covered the Button Jar in a piece of Tim Holtz fabric, adding coordinated twine to the top. I also added the die cut buttons which I coloured with Distress Inks Vintage Photo and Fired Brick, threading twine through the top button. I also used Tim Holtz Thinlits Labels to add a label to the top of my box, stamping with an alphabet to add the text buttons.
The outside of the box has been stamped with the Vintage Sewing stamp set from Artistic Outpost, stamping with Potting Soil Archival Ink and I also added three vintage buttons threaded with twine.
I added two pieces of felt to the inside of my Needle Book and used the Chevron Stitchlits Die to add holes to the felt and then added some random stitching and chain stitching.
I added a touch of colour to the felt to give an old vintage found feel to the piece again colouring with Vintage Photo Distress Ink; applying the ink to a non-stick craft sheet, spritzing with water and then mopping up the ink with the felt and then allowing to dry.
I added some random stitching to the back and front of the Needle Book for added texture and interest.
The front of the Needle Book has once again been stamped with imagery from the Artistic Outpost Vintage Sewing Set, stamped with Potting Soil Archival Ink. I also added some wooden letters decorated with Wendy Vecchi Tree Branch Embossing Powder along with random stitching and a touch of tissue tape.

http://www.eileenhull.com/


Thank you so much for stopping by. Tracy x x


Sunday 15 November 2015

Fabulous!

Morning, hope you are all enjoying your weekend. We have another fabulous challenge for you over at the Love to Create Challenge Blog where the theme is Anything Creative/Mixed Media Goes.
Still loving my Autumnal tones this week. A brayered backdrop using DecoArt Media Fluid Acrylics Vermillion, Yellow Green Light and Cadmium Red Hue.
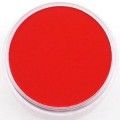
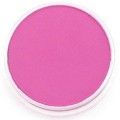
I placed the Tim Holtz Eye Chart Stencil onto the backdrop and then applied Orange and Permanent Red PanPastels over the stencil and then sprayed lightly with hairspray to fix the pastels. I then placed a die cut heart onto the background and blended Magenta PanPastel around the die cut and once again fixed the pastel with hairspray.
I added rusty wire around the heart for added texture and also included delicate splatters and painted circles stamped with a lid using DecoArt Media Fluid Acrylic Carbon Black.  To add further texture, I painted the heart with DecoArt Media Crackle Glaze and then applied a touch of Raw Umber Antiquing Cream to highlight the fine cracks.
I love adding shading with the PanPastels, so easy to apply.  I also added two hearts created with Liquid Fimo for added interest.
A stamped sentiment and tiny staples add further interest.

Thanks so much for stopping by. Tracy x x

http://welove2create.blogspot.co.uk/


Thursday 12 November 2015

Touchdown!

Welcome to my weekly post for Artistic Outpost. I have been working with the fabulous Go Team stamp set once again.
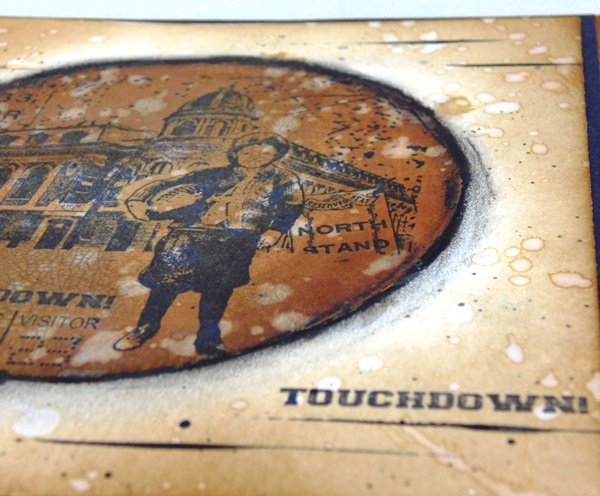
I used Wendy Vecchi's Frames and Masks to mask off the central circular area on my card which I then coloured with Vintage Photo Distress Ink; applying Ground Espresso to the edges and I then flicked the ink with water, allowed the ink to sit for a few seconds and then dabbed dry with a piece of kitchen towel and dried completely with a heat tool. With the aperture/mask still in place I then stamped the focal imagery with Black Archival Ink and dried with a heat tool.
I stamped the young boy onto a piece of scrap paper, cut it out to create a mask, placed the mask onto the stamped boy and then stamped the background imagery.
To add further interest and texture I painted the circular area with DecoArt Crackle Glaze and once completely dry I rubbed over the cracks with DecoArt Raw Umber Antiquing Cream, wiping away any excess with a baby wipe.
I scribbled Black Gelato around the circle and then blended with my finger to add a shadow. I also lightly coloured around the circular area with Vintage Photo Distress Ink, applying only light pressure so that the colour did not appear to dark and once again flicked water onto the background. I also added "TOUCHDOWN" to the bottom of the card and also included some painted scratchy lines.
To complete my piece I added a few delicate splatters of Carbon Black Fluid Acrylic to the background and dried with my heat tool.

Thanks so much for stopping by. Tracy x x

Tuesday 10 November 2015

Eileen Hull Art With Heart Challenge - New Release

Welcome to my second post of the month for Eileen Hull's Art With Heart Challenge and this month we have something special....a new release! You can find the whole release HERE. Our Challenge this month is A STITCH IN TIME and you can intepret in anyway you like.
The new products are due for release in November 2015. I decided to incorporate my pieces into an altered embroidery hoop.
I began by adding hessian fabric to my hoop and also added the die cut Embroidery Hoop from Eileen Hull.
I also die cut a dress from calico fabric which I altered slightly to fit my embroidery hoop. I coloured the calico lightly with Vintage Photo Distress Ink and added a touch of stamping using the Vintage Fashion stamp set from Artistic Outpost. I then used one of the dies from the Chevron Stitchlits set to die cut the holes from the fabric. Prior to doing any die cutting from the fabric I did paint the reverse with a coat of Gesso to prevent the fabric from fraying too much. I left one set of the holes in tact, to just add a pattern/design to the fabric and added stitching to the other two rows.
The die cut Embroidery Hoop was coloured with Vintage Photo Distress Ink, applying the ink to a non-stick craft sheet and then spritzing with water and picking up the ink with the die cut piece and then drying with a heat tool. I then dipped the hoop into any remaining ink and dried once again. I also applied Distress Ink to the edges of the hoop for definition. Tissue Tape adds a touch more interest to the design. I used the Chevron Stitchlits die once again to add detail and stitching.
I then began to layer my pieces together. I added the die cut Embroidery Hoop and my dress to the larger wooden Embroidery Hoop. I also added delicate splatters of Carbon Black DecoArt Media Fluid Acrylic to the design for added interest.
Three small wooden spools were added for texture and dimension and I also added some stamping to the outside circle of the die cut Embroidery Hoop.
The sentiment is from the Artistic Outpost Vintage Fashion stamp set which I thought was the perfect fit for this piece.
I added vintage buttons to the hoop, stitched in place along with more layers of Tissue Tape.
I love the texture of this piece achieved from all the layers added to the design.
A few more random stitches complete my design.

http://www.eileenhull.com/

Thanks so much for stopping by. Tracy x x x