Showing posts with label DecoArt Inc. Show all posts

Tuesday, 6 September 2016

"Holiday Jumpstart" with Eileen Hull

Morning and welcome, today Eileen Hull's Design Team are showcasing a whole range of products to kickstart the holiday season; that could be Autumn, Halloween, Christmas, whatever takes your fancy!
I was on a roll and decided to create three projects whilst I felt inspired! I decorated a Pumpkin, created an Autumnal card and created an ATB using techniques from Tim Holtz tag for September 2016 which you can find HERE.
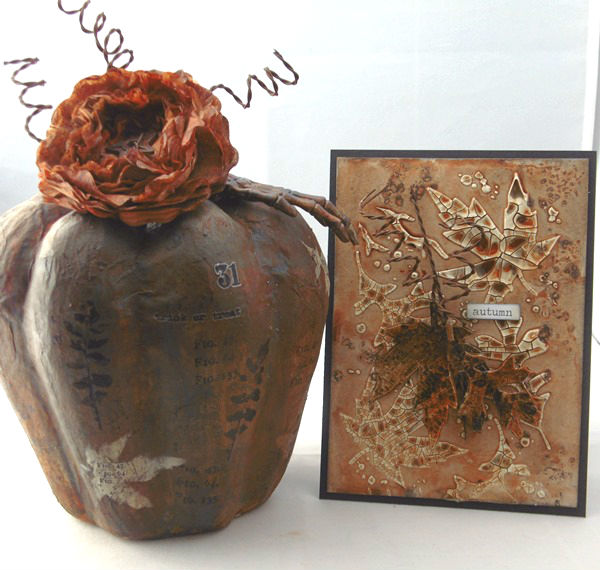
Beginning with the card I used a few of Andy Skinner's techniques to create this rustic card. I began by applying DecoArt Media Crackle Paste over Tim Holtz new leaf stencil allowing to dry completely before moving onto the next step.
Once the crackle was completely dry I then applied a wash of DecoArt Media Fluid Acrylic Dark Grey Value 3. I simply added a small amount of paint to my non-stick craft sheet and then mixed with water. I then dried the first coat of the wash with my heat tool and then added a second coat of the wash; I repeated this process until I was happy. Whilst the paint was fluid and still quite wet on my third coat I added a few sprinkles of coarse sea salt and then allowed to dry naturally.
Once the salt/paint wash was completely dry, I removed any salt particles and then added a wash of DecoArt Media Fluid Acrylic Quinacridone Gold to give that rusty tone and to age further. I applied a couple of coats of the Quinacridone Gold, drying between each application. I cut two leaves from a separate piece I created and this time painted with a more concentrated mix of the same paints. I then used Eileen Hull's Twist and Style Tool to add the spirals of rusty wire behind the leaves for added interest and texture. To complete, I added an 'autumn' sticker. Black Soot Distress Ink has been added around the edges of the panel for definition.
I then moved onto the pumpkin which was so much fun to decorate! I began by once again applying a wash of DecoArt Media Fluid Acrylic Dark Grey Value 3 and then drying with my heat tool. I then repeated the same process several times and on the last layer I again added a few sprinkles of Coarse Sea Salt and allowed to dry. Once completely dry, I removed the salt and then added layers of a wash of Quinacridone Gold and then dried with my heat tool.
For added interest I then used Tim Holtz Leaf Stencil to add stencilled leaves around the pumpkin; applying DecoArt Media Titan Buff over the stencil; using a very light touch and then drying with my heat tool. I used Andy Skinner's Toxic stamp set to add a touch of background stamping using Black Archival Ink; stamping with the stamp as is and not applying to an acrylic block. Stamping is much simplified this way as you can bend the stamp around the curved areas. I repeated this process with the leaves from Tim Holtz Leaf Prints stamp set, again stamping with Black Archival Ink.
The Fig. stamp is from Tim Holtz Undertaker stamp set which I thought worked perfectly with the leaf imagery.
I love my rusty flower which has been cut from coffee filter papers using Eileen Hull's Flower, Romance die. I added Quinacridone Gold and Raw Umber Fluid Acrylic to a spritz bottle, added water and then spritzed the flower with the mixes. I scrunched the flower whilst wet and then allowed to dry completely. Once completely dry I added a touch more intense colour with the paints using my finger. I added one of Finnabair's rusty stars to the centre to add to the rustic tones. Once again I used Eileen Hull's Twist and Style Tool to add the spirals of rusty tin wire.
No pumpkin is complete without a spooky hand!! The hand is made from plastic and once again I coloured with DecoArt Media Fluid Acrylics.
A touch more stamping adds further to the layers of interest.
I love the layers of colour that you can achieve from a few simple washes!
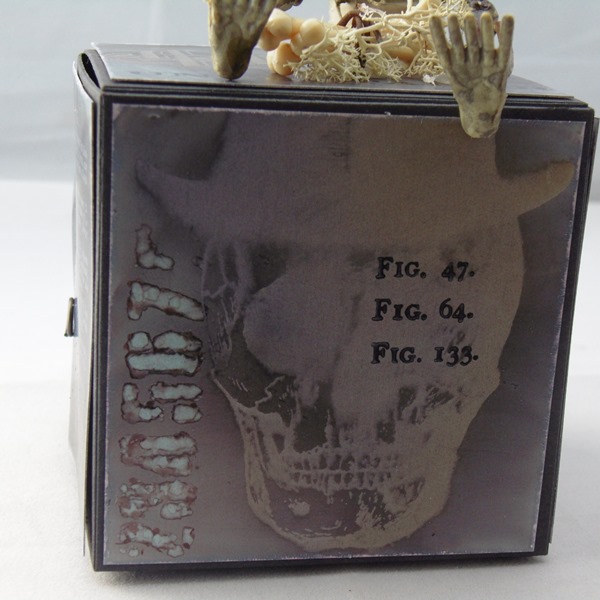
Now onto the ATB created using Eileen Hull's Block, Cube Die which I die cut from black mountboard. I then used Tim's techniques from his September 2016 tag to decorate each side; using the Undertaker stamp set and many stencils to add further interest. I also added further stamping using Black StazOn Ink.
I used Pitch Black and Latte on Yupo and the two colours together gave a purple tinge to the background which I loved. I then stamped the imagery on each side with Archival Ink and then used a soft cloth to remove the ink to reveal the resist.
I love the ghostly effect from the resist which works so well with a touch of overstamping for further detail, love it!
A touch of resist on this panel using a stencil and Alcohol Ink Blending Solution.
I added a jump ring to this skull for added interest; he looks rather dashing with his monocle!
I added touches of white paint to the edges of each panel to lift each panel a little from the black backdrop.
I added the same detail to the top of the ATB along with a plastic skeleton and a few bones from Tim's Idea-ology range.
I left a few drips of hot glue to add further to the texture.
Thanks so much for stopping by. Tracy x x


Wednesday, 20 April 2016

DecoArt Americana Canvas Painting Gallery

DecoArt have a competition running at the moment up until April 22nd to enter a piece of art into their DecoArt Americana Canvas Painting Gallery; I thought I would take some time out from deadlines and have some fun with my Americana Paints. You can find a list of all the range of colours in the Americana Range HERE.
I created a mixed media canvas with lollipop flowers.
I began by drawing two small circles onto my canvas and then applying DecoArt Media Modelling Paste to the centre; applying with a finger, dabbing to give good texture.
I repeated this process for both circles.
I used a palette knife to add textural stems to the flower heads.
I then allowed the Modelling Paste to dry completely before applying any layers of paint.
I began by painting around the flowers with a layer of Americana Indian Turquoise Acrylic Paint with touches of Desert Turquoise, to add a deeper layer of colour; applying and blending the colours with a little water and my fingers.
To add further depth to the colours in the background I applied Americana Pansy Lavender and Royal Purple around the canvas; applying the darker colour around the edges of the flowers and the edges of the canvas; again applying with my fingers until I was happy with the blend of colour.
The lollipop flowers have been coloured with Americana Bubblegum Pink and Peony Pink; adding only touches of the darker colour and a few touches of the colours from the background to give a cohesive design.
To add further interest to the background I added scratchy lines using an old credit/store card and Americana Bubblegum Pink Acrylic paint. I also added a layer of stencilling using Andy Skinner's Industrial Elements Stencil.
I added further scratchy lines with Indian Turquoise Acrylic and added delicate splatters of Cool White. I added touches of black using a black Gelato around the edges of the canvas and around the flower heads and stems.


Thanks so much for stopping by. Tracy x x

Sunday, 27 March 2016

Circle of Life

I could not sleep last night so thought I would take the opportunity to make something just for fun. Andy Skinner and Tracy Weinzapfel have a "We Dare You To Create" challenge on their Facebook page which you can find here and I thought I would take this opportunity to join in.
I decided to have a change from making cards and try a canvas just for fun.

  1. Paint canvas with a coat of Gesso.
  2. Apply DecoArt Fluid Acrylics Diarylide Yellow, Vermilion and Cobalt Teal Hue to the background of the canvas, applying with your fingers. Do not think about it too much you are aiming for a real random feel.
  3. Place Andy Skinner's Industrial Elements stencil onto the background and then apply Cobal Teal Hue randomly over the stencil. Repeat this process with Titanium White Fluid Acrylic.
  4. Using an old credit/store card add scratchy paint lines to the background using Vermilion and Cobalt Teal Hue Fluid Acrylics.
  5. Add a touch of random background stamping with Black Archival Ink for added interest. 
  6. Apply Titanium White Fluid Acrylic to paint lids and stamp the lids onto the background.
  7. Add delicate splatters of Titanium White Fluid Acrylic to the background.

  1. Once I was happy with the background stamping I then added DecoArt Carbon Black Fluid Acrylic to paint lids and stamped the circles onto the decorated background and dried with a heat tool. I then painted around the circular areas with Cobalt Teal Hue Fluid Acrylic, blocking out the background pattern apart from the cricular areas. I applied three coats to completely cover the background.
  1.  Paint around each of the circles using a fine paintbrush with a layer of Texture Sand Paste and allow to dry. Then apply one coat of DecoArt Burnt Umber Fluid Acrylic.
  2. Add touches of DecoArt Quinacridone Gold Fluid Acrylic around the circles.
  3. Add small touches of Carbon Black Fluid Acylic around the circles to add further to the rust effect.
  1. Die cut a wild flower from white card using Tim Holtz Wildflowers Die and then colour the stem with Diarylide Yellow and touches of Vermilion Fluid Actylics.
  2. Add splatters of Vermilion Fluid Acrylic to the background.
  3. Add touches of DecoArt Crackle Glaze here and there for added interest.
  1. Add touches of Carbon Black Fluid Acrylic to the edges of the canvas, applying with a finger.

 I had fun with this piece and love the contrast of the bright colours against the subtle rusted areas.

Thanks so much for popping by. Hope you are enjoing the Easter break. Tracy x x


Monday, 14 March 2016

A Vintage Journey - Destination Inspiration - Terminal 2

Morning everyone, thanks so much for popping by. Today I have a "Destination Inspiration" post to share over at A Vintage Journey.
To see the full project you just need to click HERE to be magically transported.

Hope you enjoy the step by steps. Tracy x x


Tuesday, 5 January 2016

Re-releases From Eileen Hull

Happy New Year and welcome to our monthly post for Eileen Hull's Art With Heart Challenge. This month the design team are focusing on Eileen Hull's re-releases for 2016; these are some fantastic dies that have been so missed that they have now been re-released. We don't have a challenge this month but if you would like to link any of your projects using Eileen's dies the link is HERE. There is also a prize on offer for one randomly drawn winner. There are also 6 new 3D flowers and leaves being released, one of which I showcase below along with a new Twist and Style Tool that can be used in so many ways including flower stems and home decor pieces (more information to follow on that very soon).

This week I am showcasing the fabulous Suitcase die; I love this die and it's so perfect for housing a special gift or even an accordion card or book.
I die cut the suitcase from mountboard and then placed the Tim Holtz Rays stencil onto the die cut piece and then blended Hickory Smoke and Fossilized Amber over the stencil, beginning with the lightest colour first. I then also lightly spritzed the background with Hickory Smoke Distress Spray Stain.
The flower is also another new release from Eileen Hill again coloured with Fossilized Amber Distress Ink, spritzing lightly with Hickory Smoke Distress Spray Stain. As I have used sunny colours for this piece I was thinking about holidays etc hence the ChitChat Sticker which I thought was the perfect sentiment. I also added some natural twigs behind the flower along with some Vintage Seam Binding died with Distress Ink. To complete, I coloured the edges of the suitcase with Hickory Smoke Distress Ink.

I have a few more suitcases that I have decorated over time all of which you can see in more detail by simply clicking on the links below:

The first is a mixed media suitcase combined with DecoArt Media products and Sandra Evertson Relic Pieces.
Click HERE to see this project in more detail.
I opted for a vintage feel with this suitcase.
Click HERE to see this project in more detail

Pop by Eileen Hull's blog to see more fantastic projects with this wonderful die.

Thanks so much for stopping by. Tracy x x 


Sunday, 15 November 2015

Fabulous!

Morning, hope you are all enjoying your weekend. We have another fabulous challenge for you over at the Love to Create Challenge Blog where the theme is Anything Creative/Mixed Media Goes.
Still loving my Autumnal tones this week. A brayered backdrop using DecoArt Media Fluid Acrylics Vermillion, Yellow Green Light and Cadmium Red Hue.
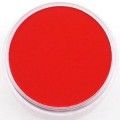
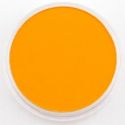
I placed the Tim Holtz Eye Chart Stencil onto the backdrop and then applied Orange and Permanent Red PanPastels over the stencil and then sprayed lightly with hairspray to fix the pastels. I then placed a die cut heart onto the background and blended Magenta PanPastel around the die cut and once again fixed the pastel with hairspray.
I added rusty wire around the heart for added texture and also included delicate splatters and painted circles stamped with a lid using DecoArt Media Fluid Acrylic Carbon Black.  To add further texture, I painted the heart with DecoArt Media Crackle Glaze and then applied a touch of Raw Umber Antiquing Cream to highlight the fine cracks.
I love adding shading with the PanPastels, so easy to apply.  I also added two hearts created with Liquid Fimo for added interest.
A stamped sentiment and tiny staples add further interest.

Thanks so much for stopping by. Tracy x x

http://welove2create.blogspot.co.uk/