I spent some time yesterday just playing for fun. I wanted to challenge myself to do a piece that was completely out of my comfort zone. I have two friends, Sue Roddis and Lesley Walters who alter many dolls, so inspired by them I wanted to create my own assemblage piece. This piece is also inspired by an on-line workshop that I am participating in called Tinytopia and the Magic of Little Things run by the very talented Mary Jane Chadbourne.
This piece is all about just enjoying the process of doing something completely different for me, spending a day just playing and seeing where inspiration takes me when creating something that is completely out of my comfort zone. I began the process with two old embrodery hoops; the smaller of which I added the dolls head to and the larger hoop houses the complete piece.
The smaller hoop and the dolls head were decorated first; painting the dolls head with a coat of PVA glue to give the surface some tooth, once dry I then began to layer my paints, firstly applying a layer of Gesso and allowing to dry. I now had a good surface to add paints. I began with a coat of DecoArt Media Fluid Acrylic Cobalt Teal Hue and then dried lightly with my heat tool. I then repeated this process for two more coats and allowed to dry naturally. I then added scratches to the face with a pair of scissors and then added touches of DecoArt Media Fluid Acrylic Burnt Umber and Quinacridone Gold, adding a layer at a time and drying with my heat tool before adding a further layer. I tend to pounce the paint on lightly with my brush rather than brush it on, and I also used a piece of Cut 'n' Dry Foam in some areas so that I did not have brush strokes on the face. Once I was happy with the face I then added layers of colour to the hoop.
I decorated my little house with Tim Holtz papers, added Carbon Black Fluid Acrylic around the sides and touches of Quinacridone Gold to the edges. I also added a couple of Remnant Rubs, Glass Beads, Hitch Fastener and a metal flower I found from a hair grip. To add a touch more interest I then housed my little house within a vintage tin and added coiled flowers to the inside. I added torn book pages from an Alice In Wonderland book but did not want to paint the pages as I like the plain pages against the painted backdrop.
I love adding layers to my design and again this little house was no different and I always love to see each layer in the design.
I also find it fun to recycle pieces like the old vintage tin and the metal flower from a hairgrip, makes these pieces even more fun to create.
I added touches of Titanium White Fluid Acrylic just around the eyes so that they did not look too dark and once again I added a second one of those metal flowers from a hairgrip to her neck. I added Chitchat Stickers to her head and then painted them with a dirty wash.
The larger hoop was also painted with DecoArt Fluid Acrylics and I added a piece of Canvas to the centre which I painted with Cobalt Teal Hue and Cobalt Turquoise Hue Fluid Acrylics, applying with a baby wipe to blend the colours. I then used a small alphabet set to add the text 'DOLLS HOUSE' to the canvas. I also included cheesecloth behind the dolls head which I dipped into a wash of Quinacridone Fluid Acrylic. Once dry I then applied further layers of paint using a piece of Cut 'n' Dry Foam.
I recycled an old pocket watch and added that to her head along with coils of rusty wire.
I really enjoyed the process of this piece and taking time out just to create for the fun of it.
I would also like to enter this into the That Craft Place Challenge which is Mixed Media Anything Goes.
Thanks so much for stopping by. Tracy x x x
Sunday 30 August 2015
Glitter and Sparkle
Morning, hope you are all enjoying your weekend. We have another fabulous challenge for you over at the Love to Create Challenge Blog where the theme is Anything Creative/Mixed Media Goes.
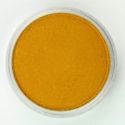
I began by brayering DecoArt Media Fluid Acrylic Green Gold across the background of the card, using only a light touch with the brayer so that some white areas were still visible. I then brayered touches of Metallic Gold Fluid Acrylic over the first colour. PanPastel Rich Gold has been applied around the edges of the card.
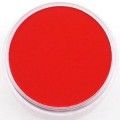
I die cut two baubles from scrap card and then placed the die cut pieces onto the background and then applied Permanent Red Shade around the die cut pieces.
I stamped the tree from Tim Holtz Halftone Christmas set into the centre of the bauble and added stencilled stars using PanPastel Permanent Red Shade.
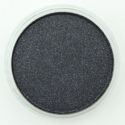
I echoed the same stamping in the smaller bauble and to add definition, I applied Black Coarse Pearl Medium PanPastel around the edges of each bauble. I also added Remnant Rubs for added interest along with delicate splatters of Metallic Gold Fluid Acrylic.
I added scratch lines to the background using an old credit card and DecoArt Fluid Arylic Paint and added 25, applying Permanent Red Shade PanPastel over a Tim Holtz Layering Stencil. I also included coordinated twine and mirrored stars for added interest.
Thanks so much for stoppping by. Tracy x x

Labels:
Cards,
DecoArt Media,
PanPastels,
Premium Art Brands,
Tim Holtz,
Tracy Evans
Wednesday 26 August 2015
Artistic Outpost Blog Hop
Time for our monthly blog hop with Artistic Outpost and this month the theme is "Designers Choice".
I am showcasing one of my all time favourite stamp sets, Birds of a Feather which I have set against an inky background. I applied Distress Inks Mowed Lawn, Peeled Paint, and Pine Needles to a heart stencil and then spritzed with water and pressed the stencil onto the white card and dabbed with a piece of kitchen towel which I then dried with a heat tool. I repeated the same process to one of the hearts.
I die cut two hearts from white card and stamped the bird image from the Artistic Outpost Birds of a Feather stamp set onto the heart with Potting Soil Archival Ink to give a vintage feel to the piece. I also added a touch of background stamping using the background stamp from Ephemera Background stamp set, stamped with Mowed Lawn Distress Ink to give a tone on tone effect. I also added some natural twine, token and a small rose for added interest and dimension.
I stamped the birds head only onto the second heart and once again added touches of background stamping but this time with Potting Soil Archival Ink. I also added 'feather' part of the sentiment from the same set.
I added a touch of shading with Distress Inks around each heart and added Vintage Photo Distress Ink around the edges for definition. I also included the sentiment from the Birds of a Feather stamp set.
My fellow team members have also created artwork to inspire you further along the blog hop.
Thanks so much for stopping by. Tracy x x
Monday 24 August 2015
Garden Keepers
Welcome to my second Guest Designer piece for Calico Craft Parts.
Here is a sneak peek, all of the details are over on the Calico Craft Parts BLOG, I have decorated a shrine this time around, I absolutely love these shrines!
Tracy Evans x x
Here is a sneak peek, all of the details are over on the Calico Craft Parts BLOG, I have decorated a shrine this time around, I absolutely love these shrines!
Tracy Evans x x
Labels:
Calico Craft Parts,
DecoArt Media,
Mixed Media,
Tracy Evans
Sunday 23 August 2015
Do what you love, love what you do
Morning, hope you are all enjoying your weekend. We have another fabulous challenge for you over at the Love to Create Challenge Blog where the theme is Anything Creative/Mixed Media Goes.
I began by applying DecoArt Media Fluid Acrylic Pyrrole Orange to the background, applying using an old credit card and then drying with a heat tool. I then added touches of DecoArt Media Acrylic Green Gold, again with a credit card, not covering the area entirely, leaving some white spaces.
I then drew two scribbly circles with pencil and then went over the pencil lines with a Black Neocolour and then smudged the black with a wet paintbrush.
I used a white gel pen to echo the circular lines and to add highlights. I then placed a heart die cut onto the background and used PanPastel Magenta over the top of the hearts and then removed the heart die cut and repeated this process around the background. I also used a Tim Holtz Layering stencil to add the small circles, applying PanPastel White Coarse Pearl Medium over the stencil. To add a further layer of interest I also applied Black PanPastel Coarse Pearl Medium over a Wendy Vecchi stencil. To add further depth to the colour I applied PanPastel Orange to the edges of the background.
I added a ChitChat sticker along with stamped sentiments to the circles, stamped with Black Archival Ink.
I also added further interest with scratchy lines applied with a credit card and DecoArt Media Acrylic Paints. To complete I added delicate splatters of DecoArt Media Titanium White Acrylic Paint.
Thanks so much for stopping by. Tracy x x

Labels:
DecoArt Media,
Mixed Media,
PanPastels,
Premium Art Brands,
Tim Holtz,
Tracy Evans
Thursday 20 August 2015
Wander without a reason or purpose.
I am showcasing the Wander and Dream stamp set from Artistic Outpost today.
To begin I cut three layers of card, placed each layer together, holding in place with low tack tape. I die cut a circle from white paper, removed the circle and placed the aperture onto the white card. I die cut a small circle of scrap paper and placed that into the aperture, to act as a mask. I tore a piece of scrap paper lengthways placed this piece onto the aperture and sponged Wild Honey Distress Ink over the edges. I then removed the torn paper and moved it up the aperture, inking as I went along. I repeated this process until I had what appear like mountains in the background of the aperture. I then removed the circular die cut piece and lightly sponged a touch of ink over the circle. With the three layers of card still in place I placed the Rays Layering Stencil onto the layers of card and sponged Distress Ink over the stencil, adding ink over the three pieces of card. I used Wild Honey, Spiced Marmalade and a touch of Fired Brick. I repeated these steps on both sides of the card, I then removed the stencil and separated the three layers and matted each piece onto a piece of black card, leaving a very narrow border.
I stamped the cactus into the aperture using Potting Soil Archival Ink and I added the sentiment also stamped with Archival Ink.
I love how the stencilled rays blend over the three pieces of card. For added interest I also included delicate splatters of paint to the background.
I die cut a small suitcase from white card, crumpled the die cut to add creases and then coloured with Distress Inks, adding more depth of colour to the creases to add to the aged feel. I then stamped the focal image onto the suitcase using Potting Soil Archival Ink. I also added the sentiment DREAM BIG along with a Remnant Rub.
I die cut two layers of the suitcase and adhered them together to make a dimensional suitcase.
Thanks so much for stopping by. Tracy x x
Labels:
Artistic Outpost,
Cards,
Tracy Evans,
Wander and Dream
Sunday 16 August 2015
Tinytopia and the magic of little things
I have recently joined in with a class run by Mary Jane Chadbourne, appropriately named "Tinytopia and the magic of little things". This is a fun on-line class and these little houses are very addictive.
I wanted to go for an eclectic mix of houses that I will have on display in my craft room. I have lots of pictures so will not talk to much about the details. I have created 6 so far with more to follow.
I love the small little details on each house and its surprising what detail you can fit in on such a small area.
I love the dolls head one with the clay hat/roof, perfect for a little pixie/fairy house.
I added 'Head Room' text on the pixie house, which I thought was perfect having a dolls head on the top. Of course I had to incorporate a Halloween house and a garden house, things I love!
I also love the little house with the metal face, hands and feet, so textural with lots of DecoArt Crackle. My witch has a fabulous metal hat aged with black paint along with added rub on's and touches of wax around the edges to give a lovely finish. I adore the hitch fastener feet!
This picture shows a little more detail on each of the houses, from a different sides. My London one was inspired by recent trip to London.
I love the owl on my Halloween one. Its such fun hunting out pieces to add to these fun little quirky houses.
The Easter one has fun little wooden bunny ears for added dimension.
The kit I purchased from Jane also has a stand to display the houses which is perfect , just a few more to complete and I will display them all together.
I hope you have enjoyed my fun little pieces as much as I have creating them!
Thanks so much for stopping by. Tracy x x
Subscribe to:
Posts (Atom)


