Simon Says Stamp and Show - a TAG.
Grungy Monday -Distress Ink-o-Rama (http://www.timholtz.com/)
The Stampman Challenge - Boys and Men.
I have created a tag accordion by simply drawing around a tag three times. I have coloured the tag with DI peeled paint and Distress Stain faded jeans. Numbers have been added to the background which have been highlighted with a white gel pen. The stamped images are from Tim's Steampunk stamp set. Steampunk has been added using Alpha Parts. Washers have been sewn to one side of the accordion and brass keys added along with mini gears movers and shapers from the Alterations range. All the edges have been sponged with black ink.
Small lightbulbs have been added to the male images along with several sprockets for added dimension.
The reverse of the tag accordion has a stamped image from Scrolls Work Stamps and gears cut using the Alterations Gadget Gears die. Brass keys, black buttons and some of my own finds have been added, you know how much I love my embellishments.
I love the old clock face I found in my stash. I also spritzed my accordion with Fresco Paint Snowflake, I love the effect it gives adding a lovely chalky finish to the piece.
Time for some much needed gardening now, thanks for stopping by, enjoy the weekend. Tracy x x
Saturday, 11 June 2011
Thursday, 9 June 2011
All Sewn Up
Time for my next DT piece using A Form Of Art set by Wendy Vecchi. I decided I would make a card and matching gift bag for my piece this week.
My card is created from Bazzill cardstock and measures 6" x 6" . I have stamped the bodice three times onto the same Bazzill cardstock and cut out. I have added ribbon to the centre bodice along with a flower cut from felt using the Tattered Florals die, using the small flower only and attaching a button to the centre. The other two bodices have been hand stitched along the corset line with black thread and I have added Trinket Pins holding a Pen Nib on one and a Brass Charm on the other.
I have then added the bodice to a panel of Bazzill cardstock and machine stitched around the edges and matt onto black cardstock and then onto the card blank. "Specimen 2b" has been stamped in the centre of the panel using Ranger Black Archival Ink and "Every Accomplishment Starts With The Decision To Try" stamped onto Bazzill card and adhered to the top corner along with a Hanger Clip from the Idea-Ology range. The heart in the corner is cut from black cardstock using Tim's Mini Hearts Mover & Shaper in the Alterations range and embossed with an embossing folder and sponged with Claudine Hellmuth's Traditional Tan Studio Paint, applied with a baby wipe. 3 Snaps have been added to one side of my card for added dimension. To complete, I have added corners cut from black cardstock using the ATC & Corners Die from Tim Holtz.
My co-ordinated bag is made from Calico and my images have been stamped with Ranger Coffee Archival Ink. I have added a flower from the FLORAL Art Parts which has been stamped with the text from A Form Of Art set and I have added Trinket Pins to the back of my flower. The same ribbons and flower have been added to co-ordinate with my card.
My handles are also made from the same ribbon I have used throughout my project. I have hand sewn square black buttons to one side of my gift bag.
To complete I have added a stamped bodice to the back of my gift bag.
Thanks for stopping by, Tracy x x.
My card is created from Bazzill cardstock and measures 6" x 6" . I have stamped the bodice three times onto the same Bazzill cardstock and cut out. I have added ribbon to the centre bodice along with a flower cut from felt using the Tattered Florals die, using the small flower only and attaching a button to the centre. The other two bodices have been hand stitched along the corset line with black thread and I have added Trinket Pins holding a Pen Nib on one and a Brass Charm on the other.
I have then added the bodice to a panel of Bazzill cardstock and machine stitched around the edges and matt onto black cardstock and then onto the card blank. "Specimen 2b" has been stamped in the centre of the panel using Ranger Black Archival Ink and "Every Accomplishment Starts With The Decision To Try" stamped onto Bazzill card and adhered to the top corner along with a Hanger Clip from the Idea-Ology range. The heart in the corner is cut from black cardstock using Tim's Mini Hearts Mover & Shaper in the Alterations range and embossed with an embossing folder and sponged with Claudine Hellmuth's Traditional Tan Studio Paint, applied with a baby wipe. 3 Snaps have been added to one side of my card for added dimension. To complete, I have added corners cut from black cardstock using the ATC & Corners Die from Tim Holtz.
My co-ordinated bag is made from Calico and my images have been stamped with Ranger Coffee Archival Ink. I have added a flower from the FLORAL Art Parts which has been stamped with the text from A Form Of Art set and I have added Trinket Pins to the back of my flower. The same ribbons and flower have been added to co-ordinate with my card.
My handles are also made from the same ribbon I have used throughout my project. I have hand sewn square black buttons to one side of my gift bag.
To complete I have added a stamped bodice to the back of my gift bag.
Thanks for stopping by, Tracy x x.
Wednesday, 8 June 2011
Generic Bird Box
Time for this weeks DT post for 100 Proof Press. I decided to decorate a box this week and take a break from cards.
I have used the Generic Bird Diagram (6271-WC), Calendar Blocks (6174-XC) and Old Script (6206-TC). My box has been painted with Fresco Paint Little Black Dress. I have then cut pieces from thick board to fit my box and painted with Fresco Paints Little Black Dress and Honey Dew along with the crackle glaze. The Generic Bird Diagram has been stamped onto the top of the box with black archival ink. I have also added the word BIRD to one side of my box using Tim's Alpha Parts.
I have added the Calendar Blocks to two sides of my box and sponged the edges with DI Black Soot.
Old Script has been added to one of the other sides of my box and again the edges have been sponged with Black Soot ink.
I have added corners to two sides of my box and aged each corner a little with black acrylic paint and then removed any excess.
To complete, I added 3 black snaps and a pen nib. If you would like to see more inspiration from the Design Team, pop over to the 100 Proof Press blog HERE.
Thanks for stopping by and leaving a comment, much appreciated. Enjoy your day, Tracy x x
I have used the Generic Bird Diagram (6271-WC), Calendar Blocks (6174-XC) and Old Script (6206-TC). My box has been painted with Fresco Paint Little Black Dress. I have then cut pieces from thick board to fit my box and painted with Fresco Paints Little Black Dress and Honey Dew along with the crackle glaze. The Generic Bird Diagram has been stamped onto the top of the box with black archival ink. I have also added the word BIRD to one side of my box using Tim's Alpha Parts.
I have added the Calendar Blocks to two sides of my box and sponged the edges with DI Black Soot.
Old Script has been added to one of the other sides of my box and again the edges have been sponged with Black Soot ink.
I have added corners to two sides of my box and aged each corner a little with black acrylic paint and then removed any excess.
To complete, I added 3 black snaps and a pen nib. If you would like to see more inspiration from the Design Team, pop over to the 100 Proof Press blog HERE.
Thanks for stopping by and leaving a comment, much appreciated. Enjoy your day, Tracy x x
Tuesday, 7 June 2011
All Sewn Up For The Play Date Cafe
Time for another colour challenge at The Play Date Cafe. I decided on a sewing theme this time around.
I have used Tim's Sewing Room die to cut the bodice from Memory Box paper stack and added computer generated text to the bodice, all the edges have been sponged with Distress Ink. The card itself is again cut from Memory Box papers with a little machine stitching added for dimension.
I have added SEW to some memo pins and added behind the spool which has fibres added to co-ordinate with my bodice.
The stamped circles are from Tim's Haberdashery set of stamps and the edges have been distressed to give an aged feel. My flower has been created from the Tattered Florals die again to give that added dimension.
To complete I have added co-ordinated buttons and scissor charm.
Our inspiration picture from The Play Date Cafe.
Thanks for stopping by, Tracy x x
I have used Tim's Sewing Room die to cut the bodice from Memory Box paper stack and added computer generated text to the bodice, all the edges have been sponged with Distress Ink. The card itself is again cut from Memory Box papers with a little machine stitching added for dimension.
I have added SEW to some memo pins and added behind the spool which has fibres added to co-ordinate with my bodice.
The stamped circles are from Tim's Haberdashery set of stamps and the edges have been distressed to give an aged feel. My flower has been created from the Tattered Florals die again to give that added dimension.
To complete I have added co-ordinated buttons and scissor charm.
Our inspiration picture from The Play Date Cafe.
Thanks for stopping by, Tracy x x
Monday, 6 June 2011
A Sea Of Acetate
The Stampotique Designers Challenge this time around is to use ACETATE in your artwork. This was a little difficult as I did not have any acetate so I was on the hunt for some packaging and this weekend my husband came home with some discs from work and they were packaged in a pocked which had acetate on the front and that is where my creation began.
The circular piece is the acetate, which is very difficult to photograph as it is a reflective surface. I stamped Smushallaum onto a piece of glossy card that I coloured with DI broken china, spritzed with water to give that under water feel and added the acetate piece over the top.
I stamped Smushasha in the right hand corner and added a piece of mica over the top adding another dimension of reflective surfaces adding to that under water feel of my piece.
The heart is also a piece of acetate from packaging and I have added the Octopet image to the inside again colouring my piece with broken china ink. I have added the sentiment "Each Life Needs Its Own Quiet Place" and added quiet and place to two circles to give added dimension.
To complete I have added shells and machine stitching and added to a blue square card and sponged the edges with Adirondack snow cap ink.
I am also entering this for The Sunday Stamper challenge which this week is to create with STASH THAT MAKES YOU HAPPY and using Stampotique stamps always makes me smile and I always enjoy the process when I produce something I am happy with.
Enjoy your week, Tracy x x
The circular piece is the acetate, which is very difficult to photograph as it is a reflective surface. I stamped Smushallaum onto a piece of glossy card that I coloured with DI broken china, spritzed with water to give that under water feel and added the acetate piece over the top.
I stamped Smushasha in the right hand corner and added a piece of mica over the top adding another dimension of reflective surfaces adding to that under water feel of my piece.
The heart is also a piece of acetate from packaging and I have added the Octopet image to the inside again colouring my piece with broken china ink. I have added the sentiment "Each Life Needs Its Own Quiet Place" and added quiet and place to two circles to give added dimension.
To complete I have added shells and machine stitching and added to a blue square card and sponged the edges with Adirondack snow cap ink.
I am also entering this for The Sunday Stamper challenge which this week is to create with STASH THAT MAKES YOU HAPPY and using Stampotique stamps always makes me smile and I always enjoy the process when I produce something I am happy with.
Enjoy your week, Tracy x x
Sunday, 5 June 2011
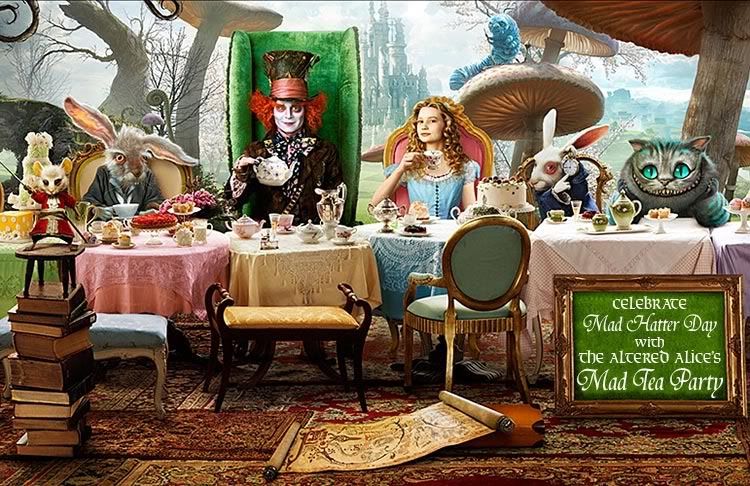
Celebrate Mad Hatter Day with a MAD TEA PARTY, Altered Alice Style!
Time for our next monthly challenge over at The Altered Alice Blog.
Join Us for a MAD TEA PARTY!
This is what I have created this month with our stamp from The Artistic Stamper.
I decided to decorate a clock from the Bo Bunny Timepiece range. I cut three circles from Bazzil card and stamped the Mabel Lucie Attwell image onto the three circles, choosing a different section of the stamp each time, sponging the edges with vintage photo Distress Ink.
I created a little HAT to represent the Mad Hatter's hat, again using papers from the Bo Bunny Timepiece range. I added small clocks to the bottom of the hat along with HATTER using black outline stickers. The Mad Hatter was added to the top of my hat.
I cut three circles from shrink plastic and repeated my stamping as before and shrunk with a heat tool. Each shrunk piece was added to the corresponding stamped circles. Scrabble letters were added for RABBIT and ALICE. HATTER was added using Tim's Alpha Parts. Three small stamped clocks were added to continue the clock theme. I stamped a clock onto calico, cut out and added to give extra texture to my piece.
The top of the clock has beige fibres added along with mini playing cards, card suit embellishments, brass clock, clocks stamped onto calico and a copper heart.
Large black buttons have been added to the top of the clock along with co-ordinated buttons to The Mad Hatter's HAT. I have really enjoyed creating this piece and would love to see you all join in with the fun this month.
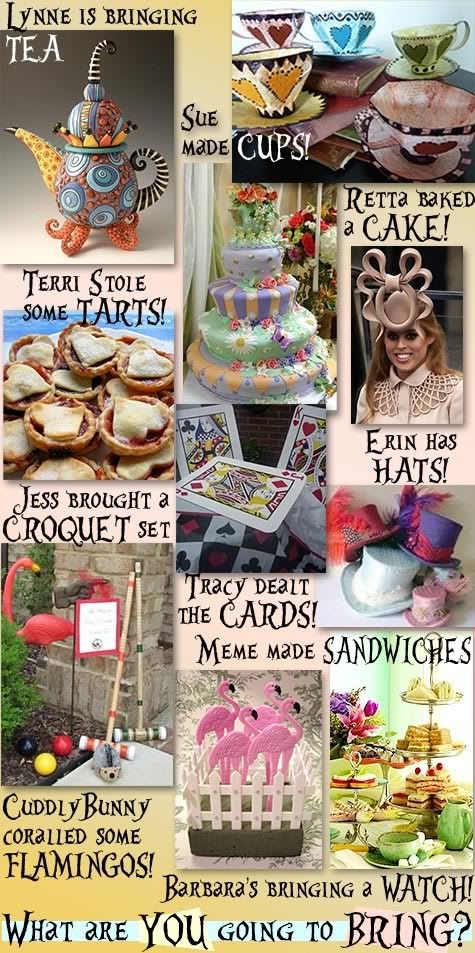
The challenge this month is to create a project to celebrate the Mad Hatter, AND to bring something to our Mad Tea Party! Here are the design team's party contributions:
So find something fun to bring to our Mad Tea Party, show and tell when you link your project that celebrates the Mad Hatter! You have until Friday, June 24 at 9:00 p.m. Eastern Daylight Time (GMT -4:00) to add your art to The Altered Alice Blog and we will announce the winner of the £15 voucher for The Artistic Stamper stamps on Sunday, June 26! Happy Mad Hatter Day from The Altered Alice!
I look forward to seeing your creations this month, Tracy xx
Wednesday, 1 June 2011
Butterflies And Moths..................
.........from Tim's Papillon set are one of my favourite stamps at the moment, not that I don't have many more but I do seem to keep going back to this one over and over again, I particularly like the text background. Over at Simon Says Stamp and Show the challenge happens to be SHOW your favourite stamp and as I am short on time I have also created my next piece for Grungy Monday which this time around is to use a technique from Tim Holtz's 12 Tags Of Christmas, 2007, Day 10.
I have used the technique on all my stamped pieces, which gives a lovely shabby chic appearance to your finished piece.
I have added black machine stitching to some of the stamped pieces to give extra dimension along with a pen nib and some black snap fasteners.
I have added filmstrip frames and FLY to complete. Thanks for stopping by, Tracy x x
I have used the technique on all my stamped pieces, which gives a lovely shabby chic appearance to your finished piece.
I have added black machine stitching to some of the stamped pieces to give extra dimension along with a pen nib and some black snap fasteners.
I have added filmstrip frames and FLY to complete. Thanks for stopping by, Tracy x x
Subscribe to:
Posts (Atom)