Sunday, 31 May 2015

Imagine a world without colour!

Morning, hope you are all enjoying your weekend. I am thrilled to announce that I am now a member of the Premium Art Brands Design Team, showcasing some of their fabulous products including PanPastels and mixed media products. We have a fabulous challenge taking place at the moment over at the Love to Create Challenge Blog where the theme is Anything Creative/Mixed Media Goes.
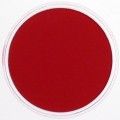
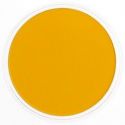
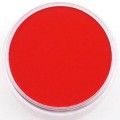
I decided to go for a bright bold colour palette this time around using PanPastels Diarylide Yellow, Permanent Red and Permanent Red Shade. I adore these colours, so vibrant.

PanPastels are saturated with colour and very vibrant, you can lay down a lot of colour in one swipe; you can blend colours and add one colour onto another to make more colours with no contamination. Simply remove the second colour with a clean applicator. You also get very little dust with the PanPastels too and you can also erase areas with an eraser, great technique to use in mixed media pieces. When I am using several colours I tend to wipe away the first colour onto a piece of kitchen towel before going to the second colour. You can also mix colours directly onto the pastel, these are so versatile.
I created a card and an Artist Trading Block which could also double as a coordinated gift box. I lay down a layer of Diarylide Yellow PanPastel onto my card and then blended Permanent Red around the edges then going back to the yellow in some areas blending as I moved around; where the two colours blend this creates an orange tone, love it!
I then stamped the Visible Image (flower INKognito) onto the background using VersaMark Ink and then applied Permanent Red Shade over the image. I also stamped the Visible Image Imagine onto the background and once again applied Permanent Red Shade over the top. I adore the layers of colour you can achieve.
To add a further layer of interest I added delicate splatters of black paint to the background and matted the design onto black card.
The Artist Trading Block has been cut using Eileen Hull's Block/Cube die cut from black mountboard. I have then decorated each side with PanPastels and imagery from Visible Image.
Again my aim was to add layers to my design. I also love applying PanPastels to the background and then simply pressing a stamp firmly onto the background to leave a shadow/watermark in the background.
I also added delicate black splatters to the backdrop to coordinate with the card.
I also added a further layer by applying VersaMark through a Tim Holtz Layering Stencil and then adding PanPastels over the top.
http://welove2create.blogspot.co.uk/
Thanks so much for stopping by. Hope you can join us for this fabulous challenge. Tracy x x


Wednesday, 27 May 2015

Artistic Outpost Monthly Blog Hop

Time for our monthly blog hop with Artistic Outpost and this month it is a Designers Choice.
I decided to create a piece with the newly released Springtime stamp set onto a mixed media background.
The background has been coloured with Distress Inks Worn Lipstick and Squeezed Lemonade, applied to a non-stick craft sheet, spritzed with and then mopped up with the card and dried with a heat tool. I also then dabbed the card back into any remaining ink  and dried once again.
I also added the farm in the background from the Country Life stamp set, stamped in black Archival Ink. I also included painty circles and scratchy lines using Mustard Seed and Worn Lipstick Distress Paint for added layers of interest.
I added a few delicate splatters of Distress Paint, Black Soot and Worn Lipsick and added the sentiment from the Springtime stamp set.

My fellow team members have created more inspirational work to inspire you further along the blog hop.


Thanks so much for stopping by. Tracy x x


Saturday, 23 May 2015

Curiosity

Today I am posting something I made just for fun.
This piece was all about fun and all the things I love, rust, mixed media, layers and texture. When creating a piece like this I add many layers and the first layer on this piece was Black Gesso from DecoArt, this product is fantastic, so thick and creamy and covers with one coat. I then added a layer of Crackle Paste and allowed to dry naturally. Once completely dry I then added a layer of Quinacridone Gold paint again allowing to dry naturally. I then darkened areas with Burnt Umber paint, using a stippling action to add light touches of colour layer by layer. I then added touches of Paynes Grey here and there along with touches of Cobalt Teal Hue. I then went over the whole piece with a Dirty Wash (Andy Skinner technique) and allowed to dry.
I added one of Sandra Evertson's Prima Cast Pieces, which I adore and I added touches of Crackle Paste to the face. Again once dry I painted with DecoArt paints and added a dirty wash over the top, adding text pieces from an Alice In Wonderland Book.
The inside was also painted with Black Gesso and then layers of colour added.
I added rusty wire to the inside and wrapped around the outside too for added texture and added a Typed Token from Tim's Idea-ology range.
I love the texture the Crackle Paste gives to this piece, so tactile.
I also included a pen nib and beads for further interest along with a ChitChat Sticker.
Thanks so much for stopping by. Tracy x x

Wednesday, 20 May 2015

New Release From Artistic Outpost

We have a fabulous new release from Artistic Outpost, two stamp sets, Wander and Dream and Springtime. I have created two cards to showcase each set.
The focal image and sentiment used on my first card are from the Springtime stamp set. I began by cutting a piece of black card 4.5" x 6.5" and then die cutting two circles from the black card, die cutting so that the circle cut off the edge of the card in both places.
I then cut a piece of white card 4.5" x 6.5" and then coloured the white card with Color Bursts in Lemon Yellow and Orange and I then adhered the black card to the coloured piece and then stamped the focal image into the die cut area. I also added random machine stitching to add a further layer of interest along with a banner with the word PLAY added.
For further interest I also included two Flashcards, sanded each one and then coloured with Spiced Marmalade Distress Ink and then stapled into place.
I added the sentiment to the second cut out area and then matted my completed design onto a piece of orange and black card stock.
I will have more projects for you over the next few weeks with both sets.
My next card is using the Wander and Dream stamp set and again the desert dictated my colour scheme really, I could not resist but to go for a hot bold colour palette. I began with a blank acrylic block, applied Spiced Marmalade Distress Ink to the block, spritzed with water and then pressed the block onto a piece of white card and then cut out. The block was appoximately 3" x 5".
I then stamped the desert onto the coloured background using second generation stamping and I then added the cowboy to the left of the desert scene.
I placed Tim Holtz Rays Layering Stencil onto my design and added a burst of rays to the background to add a further layer of interest. I then added the sentiment to the top of my design stamped with Archival Ink and added the word WANDER to the bottom of my design.
My fellow team members have created wonderful pieces to inspire you along the new release hop. Thanks so much for popping by. Tracy x x

Tracy (me)
Kate
Gerrie
Lisa

For a chance to win a fabulous prize simply pop by each of the Design Team Members blogs.  Three randomly selected winners will win a $15 Artistic Outpost Gift Certificate, to spend towards the purchase of AO stamps!  You have until Saturday 23rd May 2015 to leave comments at each of my AO Design Teammate’s blogs for a chance to win!!  Three random winners will be selected from the comments left on the designer’s blogs and the winners will be announced on the Artistic Outpost blog on Sunday 24th May.  Be sure to check back there to see if you have won!!

Thanks so much for stopping by. Tracy x x 


Tuesday, 19 May 2015

Book of Expressions!

We have a fantastic Mixed Media Mayhem challenge with Eileen Hull's Art with Heart Challenge. I decided to create a second piece this month as I am having so much fun combining Eileen's dies and the DecoArt Media Range.
I decided to decorate Eileen Hull's Passport Book, which I die cut from mountboard and decorated using DecoArt Media range.
I began by die cutting the covers and pages of the Passport Book from mountboard and I then randomly applied DecoArt Texture Sand Paste to each of the pages and covers along with random touches of DecoArt Crackle Paint.
I would normally put a base coat under crackle but as I was going to rust everything I did not bother this time around as that was not the look I was going for. I added a Prima Archival Cast piece by Sandra Evertson, a heart one as the first layer and then the faces adding more DecoArt Texture Sand Paste for added texture. I also added nails for added interest.
Once everything was completely dry I then painted all the pages and the covers with DecoArt Media Acrylic Cobalt Teal Hue and allowed to dry naturally.
I then set about adding layers of paint to create the rust using Quinacridone Gold (which is just like rust in a bottle). I used a flat brush but kind of stippled the colour over my piece and made sure it was worked into the cracks to really add to that aged feel.
The DecoArt Texture Sand Paste is fast becoming one of my favourite products to use for adding texture to a design, the transformation when it is painted is amazing.
I also applied the same treatment to the spine of the Passport Book attaching the pages with twine which has also been coloured lighly with Quinacridone Gold paint. I also added some metal leaves from an old necklace to add further interest.
Nails have also been added to the spine of the book along with Rust Glass Beads from Finnabair's range from Prima.
I did not want to cover up all of the texture I had created so left the back cover without any further decoration, I just love how tactile this piece is.
When I was happy with the rusty effect I had achieved, something else was not quite right, the Cobalt Teal Hue was a little too bright for a rusty piece so I applied a Dirty Wash (technique from Andy Skinner) which is approx 70% Quinacridone Gold, 30% Paynes Grey and Matt Varnish, I was not very exact to be honest but the result I loved. I simply brushed over all of my pages and covers with the wash and I was happy with the result.
This book is all about expression, not only the lack of expression on the faces but also me expressing myself artistically and just going with the flow and seeing where inspiration took me. I added more of the leaves to the cover for added texture to the design.
For further interest I also added a few Remnant Rubs here and there.
The Texture Sand Paste when painted really does add to that rusty feel of the piece and I adore the crackle.
Every page is just packed with texture, I love it.
As my book is all about expression and faces I did add further imagery to the inside using Tim Holtz stamps.
I also added further Rub On's to the insde and added further touches of Quinacridone Gold paint to blend the imagery into the background.
Hope you have enjoyed looking at this piece as much as I have creating it.

There is still plenty of time to enter the Eileen Hull Art with Heart Challenge and so many possiblities.

I would also like to enter this into the Simon Says Stamp Monday Challenge which this week is an alphabetical challenge, XYZ. I used yarn for Y, X in expression and Zero's in my Rub On's for Z, a great challenge this week.

Thanks so much for stopping by. Tracy x x x