Hi and welcome, I have a post just for fun for you today.
Sometimes I think its good to just take a break from deadlines and just create for the fun of it, no theme in mind, just going with the flow and that is how this piece evolved.
I showcased my piece in a Prima tray which I painted with Raw Umber DecoArt Media Fluic Acrylic Paint. Once dry I then painted the tray with a coat of DecoArt Media Crackle Paint (love this crackle).
I was aiming for a textural piece so the crackle gave me my first layer of texture. I then created a hand from my own hand print sewing layers together including fibres, cheesecloth, book pages, tissue and hessian all to add to the layers of texture.
I created a head from one of my moulds, this is actually quite big. I did not smooth out any cracks in the clay as I loved this look it all adds to the worn, aged and textural feel to the piece. I gave the face a wash of Raw Umber paint, adding layers and drying in between. If I added too much paint I simply used a baby wipe to wipe some away.
The head nestles on a bed of rulers from Tim Holtz Idea-ology line and I have added some delicate touches of Ocean and Turquoise Dina Wakley Paint.
A couple of old paintbrushes to add dimension and interest along with some coils of rusty wire.
I added a few Remnant Rubs for added interest and added a couple of decorative clips from my collection. Hand-held is computer generated.
A circle of rusty wire completes my quirky piece.
Hope you enjoyed this piece as much as I enjoyed creating it. Have a lovely week.
Tracy
xxx
Showing posts with label Tim Holtz Products. Show all posts
Showing posts with label Tim Holtz Products. Show all posts
Tuesday, 11 July 2017
Wednesday, 28 September 2016
Just For Fun!
I created a canvas today just for fun using Seth Apter's dies combined with Tim Holtz stamps.
I used Tim Holtz Undertaker stamp set as my focal images.
I began by brayering Hey Pesto Fresco Finish Paint across my canvas, using a light touch and then drying with my heat tool.
The next layer was Beach Hut Fresco Finish Paint and again dried with a heat tool.
Next was a thin layer of Taupe and then Chartreuse Fresco Finish Paints, again drying each layer of paint before applying the next layer. I then added a top coat of Cheescake to lighten a little.
I also added Chartreuse paint around the edges using my finger.
Touches of Beach Hut added to give subtle hints across the top, applying with my finger and then dried with a heat tool.
I added two colours of Fresco Finish Paint to two pieces of scrap card and then pressed them together and then dried with my heat tool.
I love the texture this gives when the card is pressed together. I also heated with my heat tool to create a few bubbles.
I then used Seth Apter's die to die cut from the coloured pieces of card.
Touches of rust have been added to the edges of the die cut pieces as a contrast against the background. I also added stencilling using Tim Holtz stencil and Quinacridone Gold DecoArt Fluid Acrylic Paint.
I applied Black Soot Distress Crayon around the edges of the canvas and around the edges of the die cut pieces.
Splatters of Titanium White paint lift the whole design.
Touches of background stamping with Black Archival Ink and Tim's stamps along with Jump Rings for added texture.
I then added the skull images as my focal imagery, keeping one image white with no colour as a contrast. I love how all the layers of paint are still visible within the design!
Thanks so much for stopping by. Tracy x x
Labels:
DecoArt Media,
DecoArt Projects,
Ranger,
Seth Apter,
Tim Holtz,
Tim Holtz Products
Sunday, 24 July 2016
Girl With Attitude!
I have been creating once again with Trish Latimer's WhimsyGirl Three, one of Trish's newly released stamps, which you can find HERE.
I opted for a vibrant colour palette this time around, just to show that you can use the image in many different ways from mixed media (my first piece which you can find HERE), rusty (as in my last piece which you can find HERE) and bright and colourful which I have used on this occasion.
I applied Grunge Paste over the Stripes Layering Stencil and then added colour with Distress Paints and then spritzed with water to blend the colours as I went along.
She has a lovely stripey dress and I added a further layer of interest by adding Distress Crayons over the circle stencil. I also applied Distress Crayons over the stripes to make some of the colours pop a little more. She is also holding a little wooden bird which I coloured with Distress Ink.
I added splatters of white paint and added some white markings with a pen to add contrast. I added Black Soot Distress Crayon around the edges of her dress for definition.
I coloured her face and hair with pencils and added touches of black along with circles drawn around the image to act as a spotlight. I included Chitchat stickers for further interest.
Thanks so much for stopping by. Tracy xx
Sunday, 25 October 2015
Halloween Coffin
Morning, hope you are all enjoying your weekend. We have another fabulous challenge for you over at the Love to Create Challenge Blog where the theme is Anything Creative/Mixed Media Goes.
We are approaching Halloween so it only seemed appropriate to create something to celebrate!
I began by sticking a plastic skeleton onto my cardboard coffin box and allowing to dry completely.
I then die cut pieces of Iron Gate from black card using Tim Holtz Sizzix Iron Gate On the Edge Die and adhered them to the coffin, adding pieces of the die cuts around the whole outside bottom edge of the coffin. I then painted the whole box inside and out with DecoArt Media Fluid Acrylic Carbon Black and allowed to dry completely.
I added a witches hat to my skeleton along with a spider from Tim Holtz Alpha Parts along with some plastic chain for added dimension.
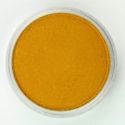
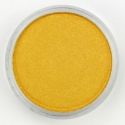
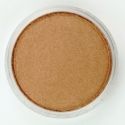
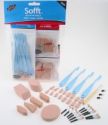
I applied VersaMark Ink to all the areas of my Coffin and then applied Rich Gold, Light Gold and Bronze PanPastels to the box, blending the colours with a soft art sponge, applying more colour where necessary.
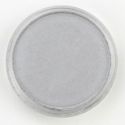
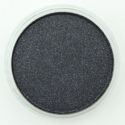
I also added touches of Metallic PanPastels to the hat and spider. I then took some time to apply Black Coarse Pearl Medium PanPastel randomly around the box and then added touches of Silver PanPastel to add further to the metallic/aged metal look. I also included seasonal ChitChat Stickers, applying Black Coarse Pearl Medium PanPastel to the edges of each sticker.
To seal the PanPastels I sprayed lightly with Hairspray.
I would like to enter this piece into the DecoArt Mixed Media Haunts Challenge along with the Emerald Creek Dares Halloween Special.
Thanks so much for stopping by. Tracy x x

Sunday, 18 October 2015
Holiday Greetings
Morning, hope you are all enjoying your weekend. We have another fabulous challenge for you over at the Love to Create Challenge Blog where the theme is Anything Creative/Mixed Media Goes.
I decided to get a head start on some of my seasonal makes this week, creating a Christmas Card using the fabulous Metallic PanPastels. I cut a piece of black card and embossed with Tim Holtz Texture Fade and I then applied VersaMark Ink directly to the embossed background and then applied Rich Gold, Light Gold and Bronze PanPastels to the background and then blended the colours with a soft art sponge; applying further PanPastels where necessary to achieve the desired depth of colour. Silver PanPastel was then applied lightly to the raised areas and I then added touches of Black Coarse Pearl Medium PanPastel to the edges and then sprayed the decorated piece with a light spray of hairspray to seal the Pastels.
I die cut a poinsettia from black card using a Tim Holtz Sizzix Die, embossed each layer of the poinsettia and then coloured with the Metallic PanPastels. I then placed the layers of the poinsettia together securing in place with a star brad.
I placed a black panel behind the poinsettia so that it did not get lost against the background and then added two Memo Pins for the Holiday Greetings sentiment.
Silver twine was also added for further interest along with silver metal corners.
Thanks so much for stopping by. Tracy x x

Labels:
Cards,
PanPastels,
Premium Art Brands,
Sizzix,
Tim Holtz Products,
Tracy Evans
Subscribe to:
Posts (Atom)


