Sunday, 13 September 2015

From The Heart

Morning, hope you are all enjoying your weekend. We have another fabulous challenge for you over at the Love to Create Challenge Blog where the theme is Anything Creative/Mixed Media Goes.
I love using hearts in my artwork so decided to incorporate them once again set against a mixed media backdrop. The background was painted with DecoArt Pyrrole Orange and Green Gold Fluid Acrylics; applying the paint with an old credit card.
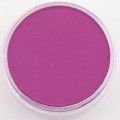
I die cut hearts from scrap card and then placed the hearts onto the background and then applied Magenta PanPastel around the heart.
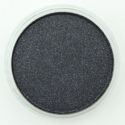
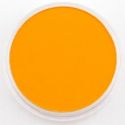
To add definition to each of the hearts I applied Black Coarse Pearl Medium PanPastel around the edges of each and smudged with my finger. I also applied Black Coarse Pearl Medium PanPastel over a Wendy Vecchi stencil to add a further layer of interest and added Orange PanPastel over a Tim Holtz Layering Stencil to add yet a further layer to the design.
I added scratchy lines of paint using an old credit card and DecoArt Media Fluid Acrylics along with delicate splatters for added interest. The sentiment 'From the Heart' is a Tim Holtz sentiment.

http://welove2create.blogspot.co.uk/


Thanks so much for stopping by. Tracy xxx


Monday, 7 September 2015

Artistic Outpost Product Focus

Time for our monthly Product Focus with Artistic Outpost and this month we are showcasing imagery from  the Storybook Themes range of stamps.
I decided to work with the fabulous Huck Finn stamp set this week showcasing the imagery on a die cut matchbox and coordinated accordion card.
I coloured the background of each piece with DecoArt Media Fluid Acrylics Dark Grey Value 3 and Titanium White, blending the colours with a baby wipe. I then applied Carbon Black Acrylic to the edge of a lid and stamped the lid onto the layered piece on the matchbox, adding shading to the circle with Gelatos. I then stamped the focal image onto the card and added delicate splatters of Titanium White paint. I also added decorative tissue tape around the edge of the matchbox.
The accordion card was also coloured with the same paint colours and once again I added painted circles randomly around the card. I then added the imagery from the Huck Finn stamp set to the accordion using Black Archival Ink.
I added shading to the circles using Gelatos, adding a black Gelato around the circle for added shading and definition. I also applied grey Gelatos to the surrounding areas of the circles to add more definition and layers of colour.
For added interest I added scratch lines with an old credit card and Titanium White Fluid Acrylic along with delicate splatters. I also stamped the text, Dream, Discover and Explore, again from the Hick Finn stamp set.
You can see more creative pieces from my fellow team members:


All stamps in the Storybook Theme category of the website will be ON SALE for 20% off through September 9, 2015!  No code is needed to shop in this sale, the sale price will be reflected in the shopping cart.

I would also like to enter this into the Craft Stamper Take it, Make it Challenge which this time around is 'Take A Stamp'.

Thanks so much for stopping by. Tracy x x x


Sunday, 6 September 2015

Stay Close To Nature.....

Morning, hope you are all enjoying your weekend. We have another fabulous challenge for you over at the Love to Create Challenge Blog where the theme is Anything Creative/Mixed Media Goes.

I brayered the background of my card with DecoArt Media Acrylic Green Gold, using only a light touch when brayering so that some of the background was visible. I then applied DecoArt Media Acrylic Pyrrole Orange with an old credit card and then dried with a heat tool.
I then drew a flower onto the background and added shading to the flower with my PanPastels Orange and Magenta. Once I was happy with the shading of the flower I then added Black Coarse Pearl Medium PanPastel around the edges of the flower and smudged with my finger to add shading.
I added colour to the leaves using PanPastel Permanent Green and Green Shade, again adding Black Coarse Medium around the edges for shading. I also added the Black Coarse Medium over a Tim Holtz Dot Fade Layering Stencil to add a further layer of interest and I also added delicate spaltters of Titanium White Fluid Acrylic.
I die cut small hearts from scrap card and then placed the die cuts onto the background and then applied Magenta PanPastel over the hearts. I also stamped numbers randomly to the backdrop using Black Archival Ink. I then added white highlights with a gel pen along with scratchy lines of Pyrrole Orange Fluid Acrylic using an old credit card.
To complete I added a 'timeless' Remnant Rub' along with a sentiment stamped in Black Archival ink along with more scratch lines using DecoArt Green Gold Fluid Acrylic.

http://welove2create.blogspot.co.uk/


Thanks so much for stopping by. Tracy x x

Friday, 4 September 2015

Creative Guide - A Vintage Journey - Home Sweet Home

I am absolutely thrilled to have been invited by Brenda to join the team at A Vintage Journey; I am so pleased to have been invited along and to be joining such a talented team. This journey is inspired by Tim Holtz techniques, products, designs, ideas etc., and as a great follower of Tim's work this makes this journey even more rewarding for me.

This month our host is Jenny and her challenge is:

"For most of us the summer holidays are over, schools are back and it is nice to be home and back in the usual routines. So for this challenge let's create a project which sums up "home" for each of us (either past or present), using Tim's fabulous array of products and techniques. Just make sure Tim's style is evident in what you make".

This is how I was inspired by Jenny's challenge theme:
I took some time out to think about this piece, especially with it being my first post for A Vintage Journey. My inspiration came from one of Tim's sentiments "Enjoy The Journey". I feel creating a piece of art should be all about enjoying the process, the journey and having fun along the way. I also wanted to incorporate new products with some older pieces to, highlighting how easily the range all works together.

I began by cutting a piece of canvas to fit my embroidery hoop and then colouring the canvas with Salty Ocean and Mowed Lawn Distress Paints, blending the colours with a baby wipe. I then added a touch of Salty Ocean Distress Paint to Texture Paste and mixing together and then applied over the Hearts Layering Stencil and I then set this piece aside to dry..
Whilst the canvas was drying I then set to work on decorating the hoop. I applied a coat of Gesso, allowed to dry and then applied a coat of Picket Fence Distress Paint and dried with a heat tool. I then used my finger to apply touches of Salty Ocean, Mowed Lawn and Tarnished Brass Distress Paint to the hoop and then dried with a heat tool. I then set the hoop aside and began work again adding layers to the canvas piece. The next layer was adding Fired Brick Distress Ink over the Dot Fade Layering Stencil, adding random stencilling around the canvas. I also added pieces of Tissue Tape to the background for added texture.
I tore a heart from scrap paper and then drew around the shape onto 300gsm card; applied water to the heart shape with a paintbrush and then added Fired Brick, Salty Ocean and Mowed Lawn Distress Inks to an acrylic block and picked up each of the colours with a wet paintbrush and painted the heart and then dried with a heat tool. I then flicked the coloured heart with more water, allowed the water to sit so that the inks could react and then dabbed up the excess water with a piece of kitchen towel and then dried with a heat tool. To add a further layer of interest I added random stamping to the heart using the background stamp from Tim's Ledger Script stamp set; inking the stamp with Salty Ocean and Mowed Lawn Distress Ink. I also added touches of Tissue Tape to the heart, Chitchat Stickers, Industrial Stickers and Mini Paper Clips. From this picture you can also see that I added Remnant Rubs to the backdrop using part of Tim's Remnant Rub Resist technique
I used one of Tim's older dies the Artful Dwellings to die cut houses from mountboard, decorating each Dwelling with Tim Holtz Correspondence Paper Pad. I then die cut a heart from the centre of one of the Dwellings using the Mini Hearts Die Set, adding shading around the die cut area with Ground Espresso Distress Ink. I also added Chitchat stickers to one of the Dwellings and mini hearts to the second cut using the Heartfelt die. I also included a Salvaged Doll which I coloured with Distress Paints.
To complete I added delicate splatters of Fired Brick and Mowed Lawn Distress Paints and added a touch of Brushed Pewter Distress Paint to the stencilled hearts.

Our sponsor Country View Crafts offers one randomly drawn winner a £20 voucher to spend in their fabulous on-line shop. 


I would also like to enter this into the Craft Stamper Take it Make it challenge which this time around is "Take A Stamp" Anything Goes. I have used a Tim Holtz text background stamp on the torn heart.

Thanks so much for stopping by, hope you enjoyed my first piece. Tracy x x 


Thursday, 3 September 2015

Friendship

Welcome to my weekly post for Artistic Outpost and today I am using the fabulous Springtime stamp set once again.
I cut a piece of card 5" x 5", spritzed with water and then brayered over the surface lightly with Mermaid Lagoon Distress Paint. I then ran my brayer through a small amount of Fired Brick Distress Paint and brayered lightly over the card, making sure both layers are still visible.
I then added a further layer, applying Mermaid Lagoon Distress Ink through a stencil and a few touches of the same stencilling but with Black Soot Distress Ink. I stamped the two children onto the card with Black Archival Ink and then stamped them a second time onto a separate piece of card, cut them out and then added to the card, this gives a shadow to the image by stamping the image in the background first.
I thought the 'Friendship' sentiment from the Skating Emporium stamp set was perfect for this card. I also added a few delicate splatters of Fired Brick Distress Paint for added interest.
I coloured their faces with a Distress Marker and added a few more splatters.
I also included some stamping and stencilling to the inside of the card.

Thanks so much for stopping by. Tracy x x

Tuesday, 1 September 2015

Eileen Hull Art With Heart Challenge - Favourite Fall Things

It's time for our monthly challenge over at the Eileen Hull Art with Heart Challenge and this month our theme is "Favourite Fall Things". I also have some exciting news to share at the end of the post!
I love the Autumn season, particularly the colours of the changing leaves and this was my inspiration for this piece.
I began by die cutting my pieces for the Passport Book, three sets of pages, a front and back cover and the spine.
I then began by building up layers of brayered colour, beginning with DecoArt Cadmium Red Hue.
I continued this process adding one layer of colour at a time, DecoArt Media Fluid Acrylic Pyrrole Orange was next and then Yellow Oxide.
When brayering use only a light touch so that all the layered colours are visible. I then added DecoArt Media Green Gold and very light touches of Burn Umber. To add definition I then applied Distress Ink Ground Espresso around the edges of each piece and the folds of the spine.
Once I was happy with the layered colours I then began to decorate. I die cut Tim Holtz Layered Leaf from the front cover to give a leaf aperture and also the die cut leaf shape. I applied Ground Espresso Distress Paint to the edges of the leaf and also added a couple of Remnant Rubs for added interest.  I used the lid from one of my DecoArt Media Pastes, applied Carbon Black DecoArt Media Fluid Acrylic to the edges of the lid and then stamped the edge of the lid to the top of the front cover. I repeated this process to add smaller circles using a smaller lid. The paint was then dried with a heat tool. Each circle was painted with DecoArt Media Fluid Acrylic Titanium White, allowed to dry and then coloured with Gelatos, blending the colours of the Gelatos with my finger. I added Black Gelato around the edges of the circles and then smudged with my finger; I love how the colours really pop and the Gelatos add more depth of colour to the design.
This picture shows the book fully bound; I love all the layers of colour and the black really pops against the backdrop.
I added a touch of background stamping to the leaf using Tim Holtz Ledger Script stamp and Black Archival Ink. I also stamped 'Leaf' to the top circle using a small alphabet set.
To complete the front cover I added an 'autumn' ChitChat Sticker.
I continued adding circles to the inside pages; colouring with Gelatos.
I die cut a second Layered Leaf from scrap card and then placed the leaf onto the background of the pages and then applied Magenta PanPastel around the leaf, repeating the process to add a second leaf to the page. I then drew around each leaf with a Pitt Pen and added a touch of shading around the edges with a Distress Marker. To add a further layer of interest I also applied DecoArt Modelling Paste over Tim Holtz Dot Fade stancil, which adds further texture to my design. I also added more circles but this time coloured them with PanPastels Permanent Red and Orange.
I continued with more circles on the other pages adding a sentiment which I thought was perfect for someone who adores the garden like me!
I added more texture to these pages adding more Modelling Paste over the Tim Holtz Dot Fade Stencil.
Another fabulous sentiment, perfect for a garden lover.
I will definitely be using my Gelatos again, they really do add wonderful depth of colour to a design. Eileen Hull's Passport Book really is a wonderful die and makes a perfect gift idea!

Now onto my fabulous news.....I am so thrilled that DecoArt have accepted me to be a part of their DecoArt Blogger Outreach Program and I am absolutely thrilled. I have been using the DecoArt Media Fluid Acrylics and Media range for a long time now and I adore their ranges so this is such a thrill for me. Thank you DecoArt.


Thanks so much for stopping by, hope you can join in our fabulous challenge this month. Tracy x x