Tuesday, 4 April 2017

Eileen Hull Sizzix Scoreboard XL Die - Journal

This month we are showcasing Eileen Hull's fabulous Scoreboard XL Journal Die.
I opted for a mixed media journal this month and I have created a video for you showing the step by steps I took to create my journal, combining the journal with Eileen Hull's Clearsnap ColorBox Blend Inks. The video is at the end of this post.
I have done a few close up shots for you to see the detail and texture achieved.
I love how all the layers are visible and the sanding adds a wonderful feel to the journal.
I love adding layers to my designs and this has them in abundance.
The touches of white really lift the design.
I opted for a simple sentiment.
I love the tea stain signatures I added to the journal.
A touch of stitching adds another feature and further texture to the design.

Below is my video showing you the step by steps in more detail, I hope you enjoy. Tracy x x


Monday, 3 April 2017

Take The Scenic Route

Today I have step by steps for you combining Tim Holtz Distress Oxides with Eileen Hull's fabulous dies.
I created a card using Eileen Hull's Thinlits Travel Trailer combined with Eileen's Dots, Flowers and Rick-Rack set (I used the Rick-Rack embossing folder in this case).
I began by applying Vintage Photo Distress Oxide to a non-stick craft sheet and spritzing with water.
I cut a piece of white card 5" x 7" and then swiped the card through the beads of ink.
Spritz the card with a little more water.
Dry the ink with a heat tool.
Dip the card into any remaining beads of ink and then this time add bigger drops of water to the background.
Dry the card with a heat tool once again. Repeat these steps until you are happy with the coverage of ink.
Add Broken China Distress Oxide to a non-stick craft sheet and spritz with water.
Dab the card lightly onto the beads of ink.
Spritz the card lightly with water and then dry with a heat tool and repeat if necessary.
Blend Vintage Photo Distress Oxide Ink around the edges of the card.
Spritz the card lightly with water once you have finished blending ink around the edges.
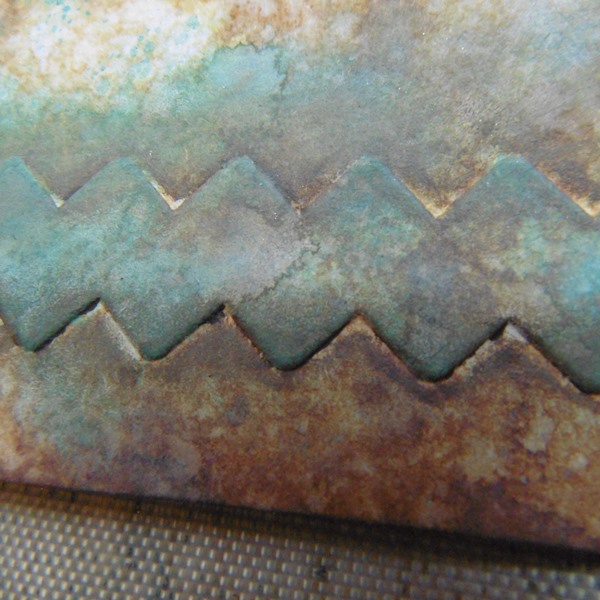
Dry the card thoroughly. From this picture you can see how the ink oxidises once you add water. You also have a chalky like matt finish.
This close up picture gives you the detail and finish achieved from the inks.
Take one of Eileen's Embossing Folders, in this case I used the Rick Rack border.
Sandwich the card between the Embossing Folder and run through a die cutting machine to emboss.
Highlight the embossed area by applying Broken China Distress Oxide to the raised areas, applying with an Ink Blending Tool.
Spritz the embossed border lightly with water and then dry with a heat tool.
Scribble Distress Crayon around the Rick Rack embossed area to add definition and smudge the crayon with a finger.
I love the shading the Crayon adds to the embossed area.
Die cut Eileen's Trailer from white card.
Colour the Trailer with the Distress Oxides, applying with an Ink Blending Tool or piece of Cut 'n' Dry Foam.
Spritz the ink with water and then dry with a heat tool.
Continue to colour the Trailer parts with Distress Oxides and then assemble.
Add some Tim Holtz Chatter Tape for added interest.
Take an old container and apply White Paint to the rim of the container, applying with a finger.
Press the container onto the background of the card.
The circle acts as a spotlight for the focal image.
Add delicate splatters of white paint to add a further layer of interest to the background.
This is the completed card which I matt onto a layer of card coloured with Broken China Distress Oxide Ink. I also added a Quote Chip for added interest.
I love how all the layers are visible in the design.
The Oxides add a total different feel to the background.
I also added a touch of shading around the Trailer to age a little further.
The touches of white really lift the design.
Thanks so much for stopping by, hope you enjoyed the step by steps. Tracy x x


Saturday, 1 April 2017

With All My Heart

I created a card today with items left on my desk from a previous project.
I masked the edges of my card with low tack tape and then blended Distress Oxide Inks Broken China and Cracked Pistachio into the central aperture. I spritzed the ink with water and then dried with my heat tool.
I inked the Tim Holtz Layering Stencil with Vintage Photo Distress Ink, spritzed the stencil with water and then placed the stencil inked side down onto the Oxide Inks and then dabbed with a piece of kitchen towel. Remove the stencil and then dry with a heat tool. This gives a mono print.
I added Paper Dolls as my focal image and added a painted white circle to act as a spotlight and added a Tim Holtz Clippings Sticker.

Thanks so much for stopping by. Tracy x x 


Friday, 31 March 2017

A Vintage Journey - Tag Friday

As there are five Fridays in March we have a Tag Friday post for you this week. Pop over to A Vintage Journey to see my fellow team members artwork.
I decided to decorate one of Tim Holtz Etcetera tags using Seth Apter's monoprint technique. I use this technique usually with acetate for Distress Inks but thought I would try Seth's adaptation using card.
There are so many layers of paint on this tag that I have lost count. Adding paint in this way gives fantastic texture to the design and each piece is unique. I used Seth's paints Mud Splat, Green Patina, Smoked Paprika and Key Lime from his PaperArtsy range. I did begin by adding a random layer of Mud Splat paint to the background using a paintbrush but I did not think about this too much and left some open areas that were not covered with the paint. I then began layering the paint over and over, applying the paint to a piece of card and then pressing the card onto the background of the tag, using different pressure each time.
I used one of Seth Apter's Wood Chips for the centre piece which I painted with Green Patina and then added Mud Splat using the monoprint method. I love how random this technique is and it really does take away the thinking process of applying paint. I also added a vintage wood/bone domino wrapped with rusty tin wire for added interest. I have also included an embroidery hoop for added dimension.
From this picture you can see all the fabulous texture and layers I have added to the design. I also included some twisted rusty tin wire using Eileen Hull's Twist and Style Tool along with a Tim Holtz Quote Chip.
For me texture really adds to a design and this piece really has texture in abundance from many layers of paint and added wooden pieces and rusty wire.
I also included two more vintage dominos to the bottom of the tag along with more rusty tin wire.
One of Tim Holtz Paper Dolls sits nicely on the rusty tin wire and finishes the tag perfectly for me.

Thanks so much for stopping by. Tracy x x