Another card this time around, a little more clean in design. I love experimenting with my card designs.
The blooms from my Natures Garden Stamp Set take centre stage here and really pop against the ore muted colours of the heart.
I began by creating my own torn heart stencil from a scrap of paper and I then blended Iced Spruce and Tumbled Glass Distress Oxide Inks over the aperture, blending the colours as I moved around my stencil.
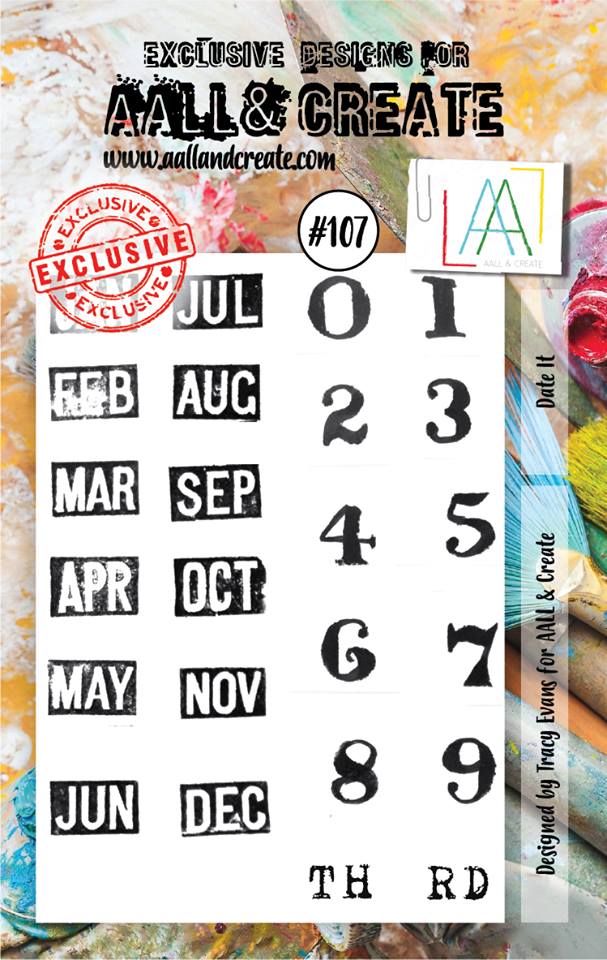
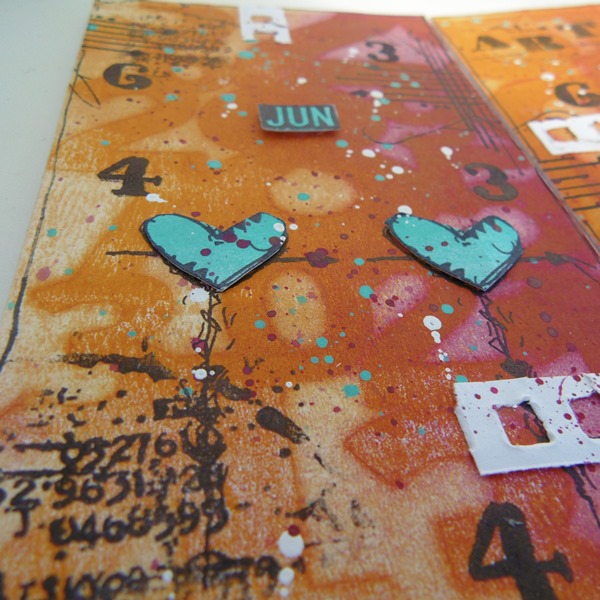
I used my Date It stamp set as a background stamp to add further interest to the backdrop.
A touch of texture is included using Autour de Mwa's Stencil.
I gave my blooms a bold pop of colour to complement the more muted tones of my heart.
A few delicate splatters of paint and my card is complete.
I added a couple of Index Clips for added dimension.
The products used in this card are shown below:
Thanks so much for stopping by. Tracy x x
AALLandCreate Web Page
AALLandCreate Facebook Page
AALLandCreate Fanatics Facebook Page
AALLandCreate Boutique.
Showing posts with label Date It. Show all posts
Thursday, 13 September 2018
Friday, 6 July 2018
Be Authentic
Welcome, today I have a canvas for you. This was one of those projects that I got totally lost in creating, I just went with the flow and it was such a joy to do. I am showcasing my A4 Stamp, Layered Grunge, my A7 Stamp Set, Date It and my Butterfly Stamp Set all available from AALLandCreate. A list of our stockists are available HERE, simply scroll down.
I began by layering my texture and Kassa's stencil #18 was perfect for the background. I then began adding layers of paint and this time around I used Distress Paints Twisted Citron and Peeled Paint. I adore green.
I also added a vintage oil dropper to my piece which gives fantastic dimension and adds another element of interest to my design. My butterfly sat perfectly on the dropper and I also incorporated some stamping on the wings using my A4 stamp set.
I incorporated an mdf piece in the background, again to add wonderful dimension. Can you spot the little face, I couldn't resist but to use this in my piece, it was lying on my desk and I thought, why not!
Some wonderful random stamping in the background using my A4 Stamp Layered Grunge and my Date It Stamp Set.
I also incorporated some micro beads for added texture and some gears for added interest. I also added my trademark cotton threads for further texture.
Delicate white splatters echo the white on the butterfly.
I also added some stamped numbers using my Date It Stamp. I love adding vintage elements to my designs and I am so pleased with how this piece came together.
These are the stamps incorporated in my canvas.
Thanks so much for stopping by. Tracy x x
AALLandCreate Web Page
AALLandCreate Facebook Page
AALLandCreate Fanatics Facebook Page
AALLandCreate Boutique.
I began by layering my texture and Kassa's stencil #18 was perfect for the background. I then began adding layers of paint and this time around I used Distress Paints Twisted Citron and Peeled Paint. I adore green.
I also added a vintage oil dropper to my piece which gives fantastic dimension and adds another element of interest to my design. My butterfly sat perfectly on the dropper and I also incorporated some stamping on the wings using my A4 stamp set.
I incorporated an mdf piece in the background, again to add wonderful dimension. Can you spot the little face, I couldn't resist but to use this in my piece, it was lying on my desk and I thought, why not!
Some wonderful random stamping in the background using my A4 Stamp Layered Grunge and my Date It Stamp Set.
I also incorporated some micro beads for added texture and some gears for added interest. I also added my trademark cotton threads for further texture.
Delicate white splatters echo the white on the butterfly.
I also added some stamped numbers using my Date It Stamp. I love adding vintage elements to my designs and I am so pleased with how this piece came together.
These are the stamps incorporated in my canvas.
Thanks so much for stopping by. Tracy x x
AALLandCreate Web Page
AALLandCreate Facebook Page
AALLandCreate Fanatics Facebook Page
AALLandCreate Boutique.
Friday, 29 June 2018
Blossom Card
Welcome to todays blog post. I have created a card today using my Quirky Blossoms stamp set from AALLandCreate. You can find a list of our stockists HERE, simply scroll down.
I opted for Kraft card today, I love the natural feel it gives to a design and here it showcases my Quirky Blossoms perfectly.
I added a layer to my background using Autour de Mwa's stencil number #30, applying Distress Oxide Ink directly to the stencil, spritzing with water and then placing the stencil ink side down onto my painted backdrop.
The Turquoise paint applied in the background around the edges was applied with my fingers. I also added dots of white paint using a small ball tool, dipping the tool into my paint and adding the dots around the outside edge.
I added a touch of dimension to my flower and also included some cotton threads for added texture. I also doodled some lines around the outside edge of my design.
I added some delicate splatters of white paint and some scratchy paint lines using an old credit card. I also included some touches of white to my flower using a white gel pen. I also included months using my Date It samp set, stamping onto white card with Vermillion Archival Ink.
These are my stamp sets used this time around.
Thanks so much for stopping by. Tracy x x
AALLandCreate Web Page
AALLandCreate Facebook Page
AALLandCreate Fanatics Facebook Page
AALLandCreate Boutique.
I opted for Kraft card today, I love the natural feel it gives to a design and here it showcases my Quirky Blossoms perfectly.
I added a layer to my background using Autour de Mwa's stencil number #30, applying Distress Oxide Ink directly to the stencil, spritzing with water and then placing the stencil ink side down onto my painted backdrop.
The Turquoise paint applied in the background around the edges was applied with my fingers. I also added dots of white paint using a small ball tool, dipping the tool into my paint and adding the dots around the outside edge.
I added a touch of dimension to my flower and also included some cotton threads for added texture. I also doodled some lines around the outside edge of my design.
I added some delicate splatters of white paint and some scratchy paint lines using an old credit card. I also included some touches of white to my flower using a white gel pen. I also included months using my Date It samp set, stamping onto white card with Vermillion Archival Ink.
These are my stamp sets used this time around.
Thanks so much for stopping by. Tracy x x
AALLandCreate Web Page
AALLandCreate Facebook Page
AALLandCreate Fanatics Facebook Page
AALLandCreate Boutique.
Monday, 11 June 2018
Artsy Layered Card for AALLandCreate
Welcome to todays blog post, showcasing my A4 Stamp Layered Grunge, my Date it Stamp and my Border Stamp from the previous release. You can find all the stockists listed HERE. The previous release are also available from the Boutique.
This time around I brayered two colours of paint Dina Wakley's Cheddar and Fuchsia paints onto my white card and then used Autour de Mwa's stencil #30 to give extra detail to my background.I added some background stamping using my border stamp below.
I love this border stamp, it has so much potential.
I used the hearts from the border stamp as my focal image, I love these hearts. I also love how the numbers are visible below my focal imagery.
I included my Date It Stamp, adding numbers and the months to my background.
I incorporated my A4 stamp, adding some random stamping to the background, I love using the numbers from this stamp.
This picture shows all the layers and how they work so well together. I also included some delicate splatters of white paint along with a few random pieces of edgeing from a watercolour pad.
I also decorated the background of my card using Autour de Mwa's stencil.
These are the other two stamp sets included in my design.
Thanks so much for stopping by.
Tracy
xx
AALLandCreate Web Page
AALLandCreate Facebook Page
AALLandCreate Fanatics Facebook Page
AALLandCreate Boutique.
Friday, 18 May 2018
Beautiful Blooms
Welcome to another of my AALLandCreate blog posts showcasing my recently released sets of stamps.
I really enjoyed creating this piece, something a little different, using one of Tim Holtz Framed Panels. I only added a touch of colour to the frame, dry brushing white acrylic paint over the detail to soften the frame a little to blend with my artwork.
I used my Quirky Blossoms for this piece, which I adore. I stamped the Blossom onto Parchment Paper and then embossed on the back of the Parchment with an embossing tool to give me the white areas.
I stamped onto the parchment paper with VersaMark Ink and then embossed with Nuvo Glitter Embossing Powder to add a little sparkle to my design. I added a second layer to the flower to give dimension, adding dimension to the flower head only.
I added some delicate splatters of white paint and added some stitching to the stems. You do have to be careful when sewing into parchment so that the parchment does not tear.
I also included a vintage pen nib, painted silver for further dimension and interest along with the sentiment Simply Beautiful, also stamped onto parchment paper.
I stamped numbers with Distress Oxide Ink using my Date It stamp along with the month of May also stamped onto white card with Distress Oxide Ink.
All the new releases are available from our stockists using the link HERE.
I loved working with parchment this time around and it really does give an alternative look to my stamp designs.
All the AALLandCreate stamp sets are available from the Boutique.
Thanks so much for stopping by. Tracy x x
I really enjoyed creating this piece, something a little different, using one of Tim Holtz Framed Panels. I only added a touch of colour to the frame, dry brushing white acrylic paint over the detail to soften the frame a little to blend with my artwork.
I used my Quirky Blossoms for this piece, which I adore. I stamped the Blossom onto Parchment Paper and then embossed on the back of the Parchment with an embossing tool to give me the white areas.
I stamped onto the parchment paper with VersaMark Ink and then embossed with Nuvo Glitter Embossing Powder to add a little sparkle to my design. I added a second layer to the flower to give dimension, adding dimension to the flower head only.
I added some delicate splatters of white paint and added some stitching to the stems. You do have to be careful when sewing into parchment so that the parchment does not tear.
I also included a vintage pen nib, painted silver for further dimension and interest along with the sentiment Simply Beautiful, also stamped onto parchment paper.
I stamped numbers with Distress Oxide Ink using my Date It stamp along with the month of May also stamped onto white card with Distress Oxide Ink.
All the new releases are available from our stockists using the link HERE.
I loved working with parchment this time around and it really does give an alternative look to my stamp designs.
All the AALLandCreate stamp sets are available from the Boutique.
Thanks so much for stopping by. Tracy x x
Labels:
AALL&Create,
Date It,
Mixed Media,
Quirky Blossoms,
Tim Holtz,
Tracy Evans
Tuesday, 15 May 2018
Follow Your Dreams
Hi and welcome, today I have a blog post showcasing my wonderful A4 stamp set from AALLandCreate.
I opted to create one of the Large Tim Holtz Etcetera Tags this time around. I began by adding a coat of Gesso to my tag and then applying a random layer of Texture Paste to the background which I then dried with a heat tool.
I then applied a layer of Antique Linen Distress Paint to the tag and then dried this layer with a heat tool. My second layer was a coat of Vintage Photo Distress Paint which I dried very lightly and then wiped back with a baby wipe. The darker tones rest in the crevices of the Texture Paste which I love.
I then stamped my A4 stamp set with Black Archival Ink onto the background of the tag and I then used a baby wipe to tone down the black a little. My next layer was a touch of Tumbled Glass Distress Paint dry brushed over the top of the stamping.
You can find my A4 stamp set from our list of stockists which you can find HERE.
I added some rusty wire around my focal DREAM text along with some micro beads for added texture. I also incorporated my Date It stamp set for a further layer of interest.
Again this stamp set is available from our stockists which you can find HERE.
I incorporated some cheesecloth for more texture along with some vintage music paper and added my flowers from my Natures Garden set for further interest and dimension. I also added more micro beads to each of the flowers along with some rusty wire wrapped around the tag.
I used the flower image at the bottom for this project.
I added some natural jute at the top of my tag and stamped some numbers randomly onto the background, again using my Date It stamp set.
The texture and dimension on this tag worked out really well, shame you can not feel all the texture through the screen!
Thanks so much for stopping by. Tracy x x
You can find all our stamps in the AALLandCreate Boutique.
I opted to create one of the Large Tim Holtz Etcetera Tags this time around. I began by adding a coat of Gesso to my tag and then applying a random layer of Texture Paste to the background which I then dried with a heat tool.
I then applied a layer of Antique Linen Distress Paint to the tag and then dried this layer with a heat tool. My second layer was a coat of Vintage Photo Distress Paint which I dried very lightly and then wiped back with a baby wipe. The darker tones rest in the crevices of the Texture Paste which I love.
I then stamped my A4 stamp set with Black Archival Ink onto the background of the tag and I then used a baby wipe to tone down the black a little. My next layer was a touch of Tumbled Glass Distress Paint dry brushed over the top of the stamping.
You can find my A4 stamp set from our list of stockists which you can find HERE.
I added some rusty wire around my focal DREAM text along with some micro beads for added texture. I also incorporated my Date It stamp set for a further layer of interest.
Again this stamp set is available from our stockists which you can find HERE.
I incorporated some cheesecloth for more texture along with some vintage music paper and added my flowers from my Natures Garden set for further interest and dimension. I also added more micro beads to each of the flowers along with some rusty wire wrapped around the tag.
I used the flower image at the bottom for this project.
I added some natural jute at the top of my tag and stamped some numbers randomly onto the background, again using my Date It stamp set.
The texture and dimension on this tag worked out really well, shame you can not feel all the texture through the screen!
Thanks so much for stopping by. Tracy x x
You can find all our stamps in the AALLandCreate Boutique.
Subscribe to:
Posts (Atom)